
Smart Java applications using Spring AI and Gemini

In this tutorial, we will develop a simple chat client application using Spring AI integrated with Google Gemini, a powerful language model from Google. For Java developers familiar with the Spring framework, using Spring AI makes it easier to build smart applications without vendor lock-in.
We will build an application similar to the one presented in the previous tutorial:
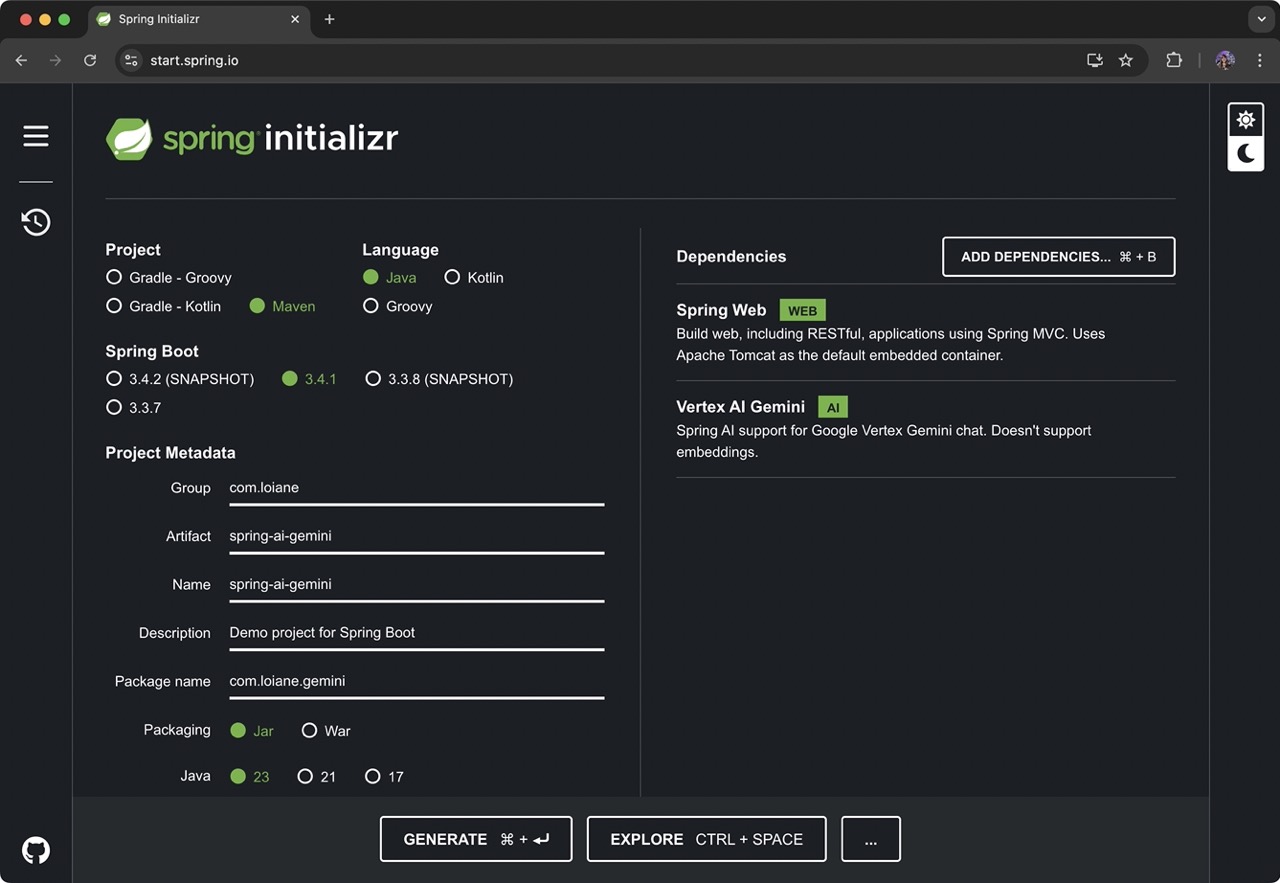
Create a new Spring Boot project.
Create a new Spring Boot project using Spring Initializr (https://start.spring.io/) or your IDE.
Selections:
- Project: Maven
- Language: Java
- Spring Boot: 3.4.1 (select the latest version)
- Enter your project metadata (package name, artifact name) as desired.
- Java: 23 (or the latest version available)
Dependencies:
Spring WebTo create REST endpoints.Vertex AI GeminiFor integration with Google's language models.
Check the pom.xml file
Make sure your
pom.xmlproject includes the dependencies required for integration with Google Gemini:<dependencies> <dependency> <groupId>org.springframework.boot</groupId> <artifactId>spring-boot-starter-web</artifactId> </dependency> <dependency> <groupId>org.springframework.ai</groupId> <artifactId>spring-ai-vertex-ai-gemini-spring-boot-starter</artifactId> </dependency> </dependencies>The
spring-ai-vertex-ai-gemini-spring-boot-starterdependency provides the necessary components and autoconfiguration to use the Gemini API in a Spring Boot application, similar to whatspring-ai-openai-spring-boot-starterprovides for OpenAI.Configuring the project
When using Google AI in a Spring AI project, we need to configure two properties in the
application.propertiesfile (or YAML):spring.ai.vertex.ai.gemini.projectId=${GEMINI_PROJECT_ID} spring.ai.vertex.ai.gemini.location=us-east4Although the project ID can be shared, it's good practice to also pass this value as an environment variable in case you're using different projects for different environments (DEV, QA, PROD).
So, how do we get this information?
First, you need to create a Google Cloud account. If you don't already have one, you can get US$300 in free credits to get started: https://cloud.google.com/gcp

Then, go to the console and create a new project, in case you don't already have one in the Google Cloud Console :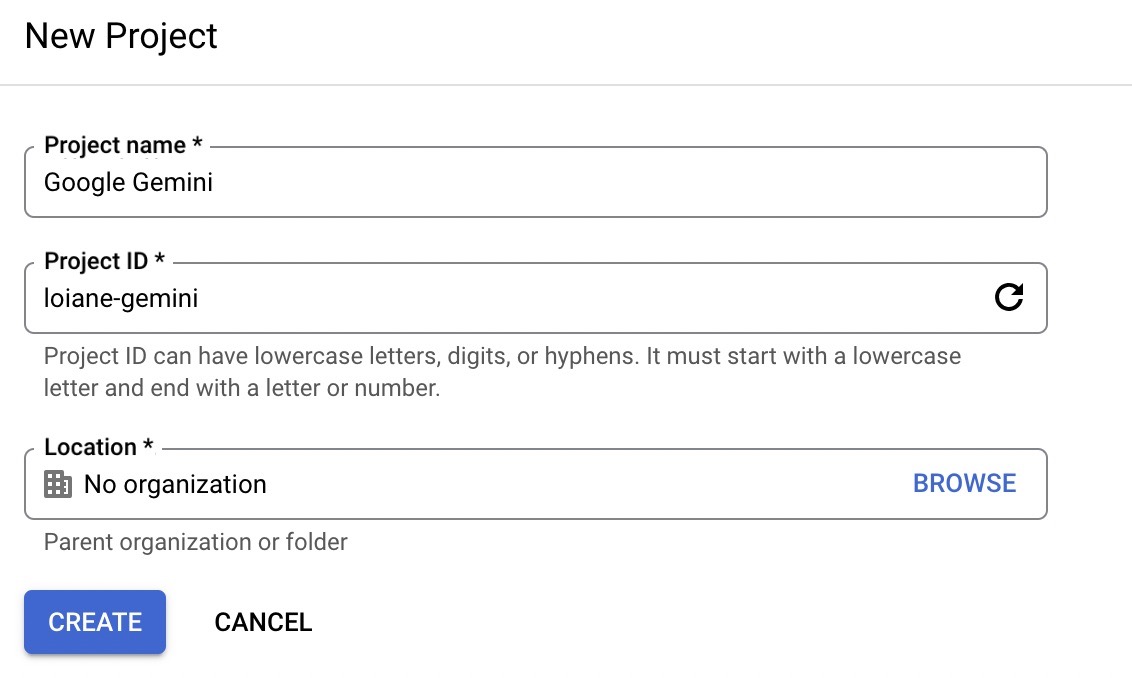
After the project is created, you will need to:- Enable billing for the project.
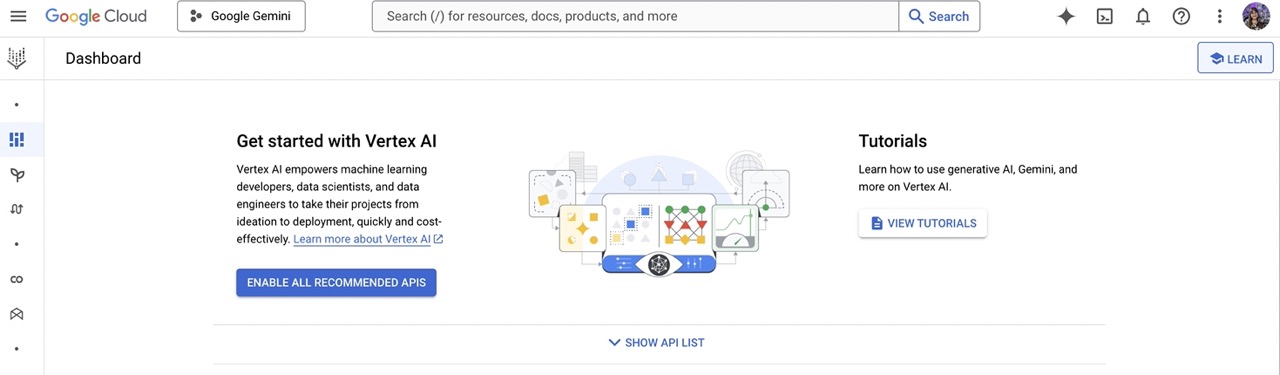
- Enable Vertex AI on your project by clicking
Enable all Recommended APIs:
Next, we will need to install the gcloud command-line tool.
Installing the Google Cloud CLI
Follow the step-by-step guide in the documentation to install
gcloudlocally: https://cloud.google.com/sdk/docs/install-sdk.After installation, initialize the CLI:
./google-cloud-sdk/bin/gcloud initLog in and select the project you created to use with Gemini:
Pick cloud project to use:
 [1] [my-project-1]
 [2] [my-project-2]
 ...
 Please enter your numeric choice:
If you only have one project,
gcloud initwill select it automatically.Note your project ID to use in the properties file, and also select the region closest to you. You can find all available locations here: https://cloud.google.com/gemini/docs/locations.
With the configuration complete, we are ready to start coding.
Creating the SimpleChatService class
To get started, let's create a
SimpleChatServiceobject that holds theChatClientmodel and a method we can invoke from the controller:import org.springframework.ai.chat.client.ChatClient; import org.springframework.stereotype.Service; @Service public class SimpleChatService { private final ChatClient chatClient; public SimpleChatService(ChatClient.Builder chatClientBuilder) { this.chatClient = chatClientBuilder.build(); } public String chat(String message) { return this.chatClient.prompt() .user(message) .call() .content(); } }Where:
- ChatClient offers
ChatClientan API for communicating with an AI model. It supports both synchronous and streaming programming models. - The
ChatClientobject is created usingChatClient.Builder. You can obtain an auto-configuredChatClient.Builderinstance for any Spring Boot ChatModel, or create one programmatically. - The
chat methodreceives amessagerequest. We will use thePromptobject from theChatClientrequest and set the user input, passing in the received message. Thecall()method sends a request to the AI model, and thecontent()method returns the AI model's response as a string.
Note that the code is exactly the same as in the previous tutorial. Again, using Spring AI makes it easier to build smart applications without being tied to a single vendor.
Creating the GoogleGeminiChatController
Create a controller and add the following code to it:
import org.springframework.web.bind.annotation.PostMapping;
import org.springframework.web.bind.annotation.RequestBody;
import org.springframework.web.bind.annotation.RequestMapping;
import org.springframework.web.bind.annotation.RestController;

@RestController
@RequestMapping("/api/google-gemini")
public class GoogleGeminiChatController {

    private final SimpleChatService simpleChatService;

    public GoogleGeminiChatController(SimpleChatService simpleChatService) {
        this.simpleChatService = simpleChatService;
    }

    @PostMapping("/chat")
    public ChatResponse chat(@RequestBody String message) {
        return new ChatResponse(this.simpleChatService.chat(message));
    }
}
This controller handles POST requests to the
/api/google-gemini/chatendpoint, extracting the message from the request body.This
ChatResponseis arecordso that we can format the output:public record ChatResponse(String message) {}6: Testing via HTTP request
If you are using IntelliJ IDEA Ultimate , you can create an
api.httpfile with the following content (this is very convenient for testing HTTP requests):POST http://localhost:8080/api/google-gemini/chat Content-Type: application/json { "message": "Tell me a joke" }Alternatively, you can also use Postman or similar tools to simulate the HTTP request.
If we send the request, we might get output similar to the following:
{
  "message": "Why don't scientists trust atoms? \n\nBecause they make up everything! \n \nLet me know if you'd like to hear another one!
great }
Summary
You have successfully created a basic Java application using Spring AI and Google Gemini. Explore further by checking out [link to the guide/platform].
- The official Spring AI documentation: https://docs.spring.io/spring-ai/reference/api/chat/google-vertexai.html
- And the Google Gemini API documentation: https://ai.google/
Happy coding!
- ChatClient offers
Translated from the Brazilian Portuguese original · Read the original