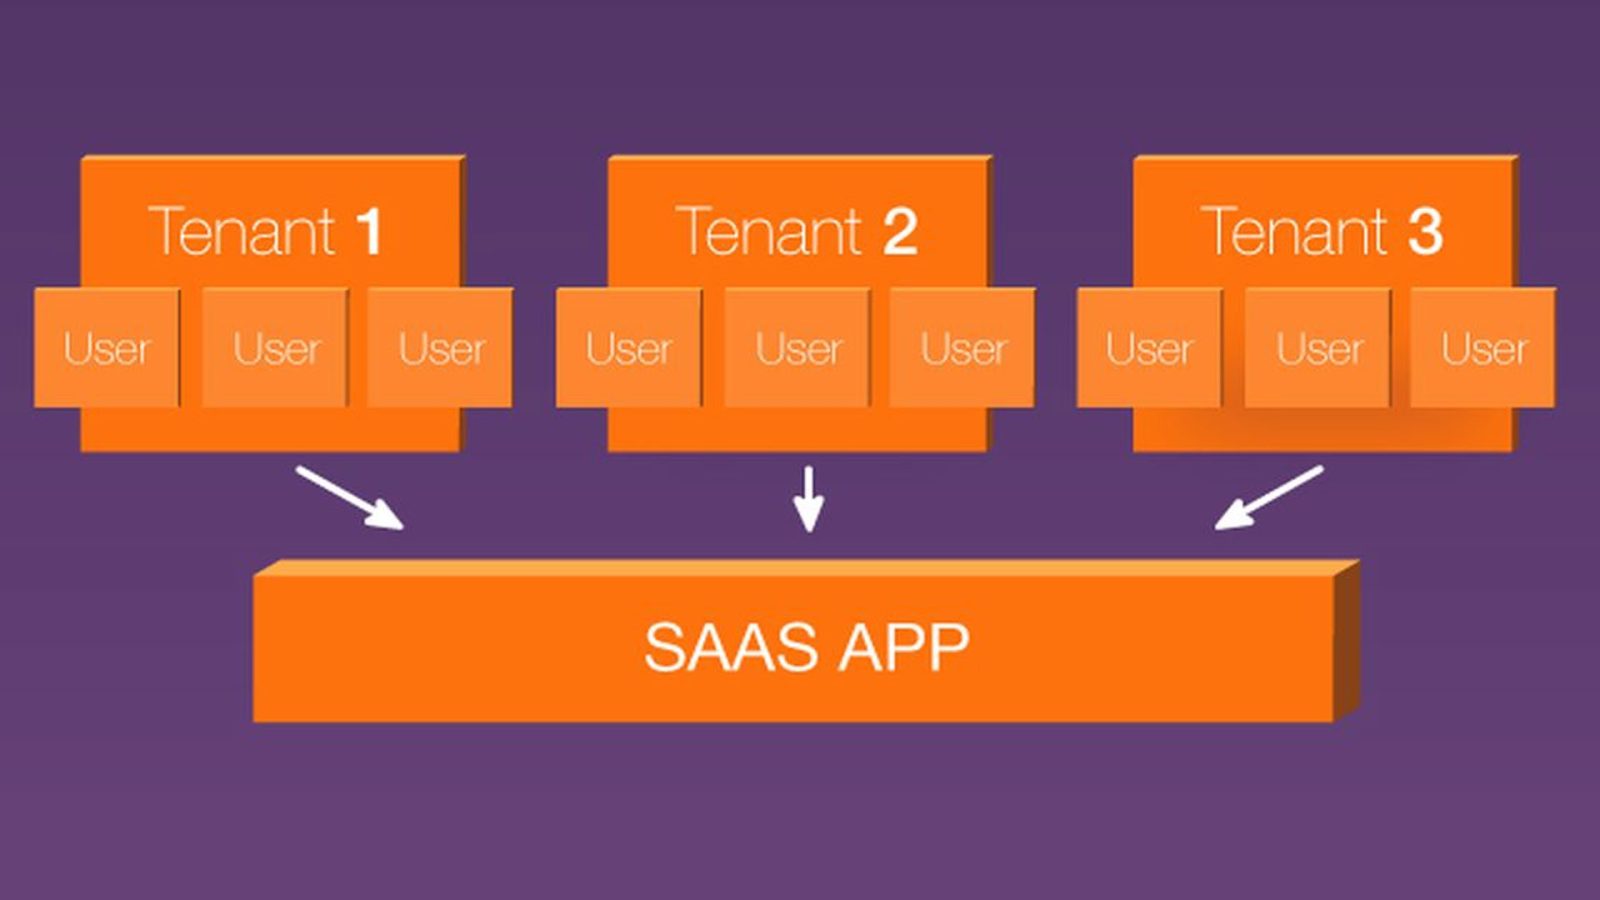
What is Multi-Tenant?
It is an architecture in which a single application instance serves multiple clients. Each customer is called a Tenant. Tenants may have the ability to customize some parts of the application, such as the color of the UI or business rules, but they cannot change the code.
Laravel makes it very easy to do this. All you need is a connection configuration, a Middleware, and a Trait and configure your Models. Let’s do this in practice.
Simple Multi-Tenant Setup in Laravel
Connection Settings
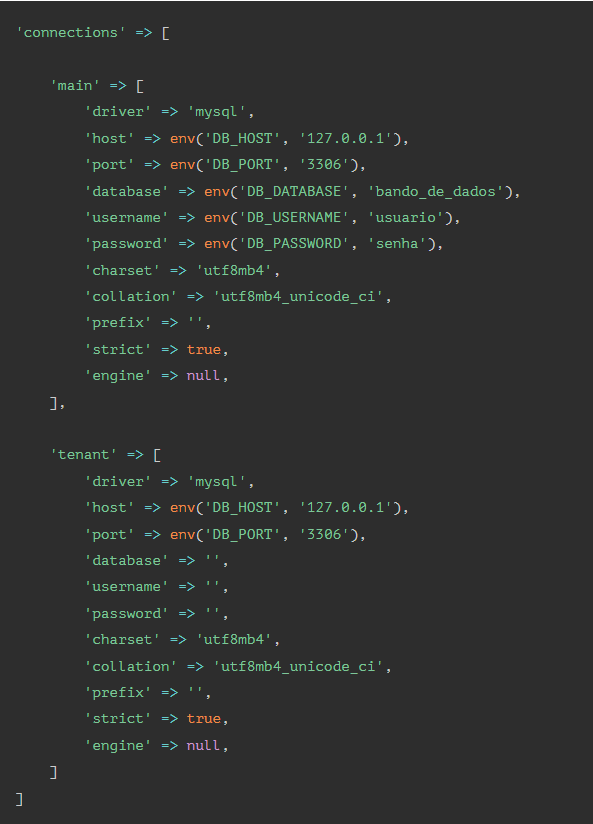
In your config/database.php file, we will define two connections. Note that I delete the MySQL connection, so it is necessary to configure the .env file for the new connection driver.
The Middleware
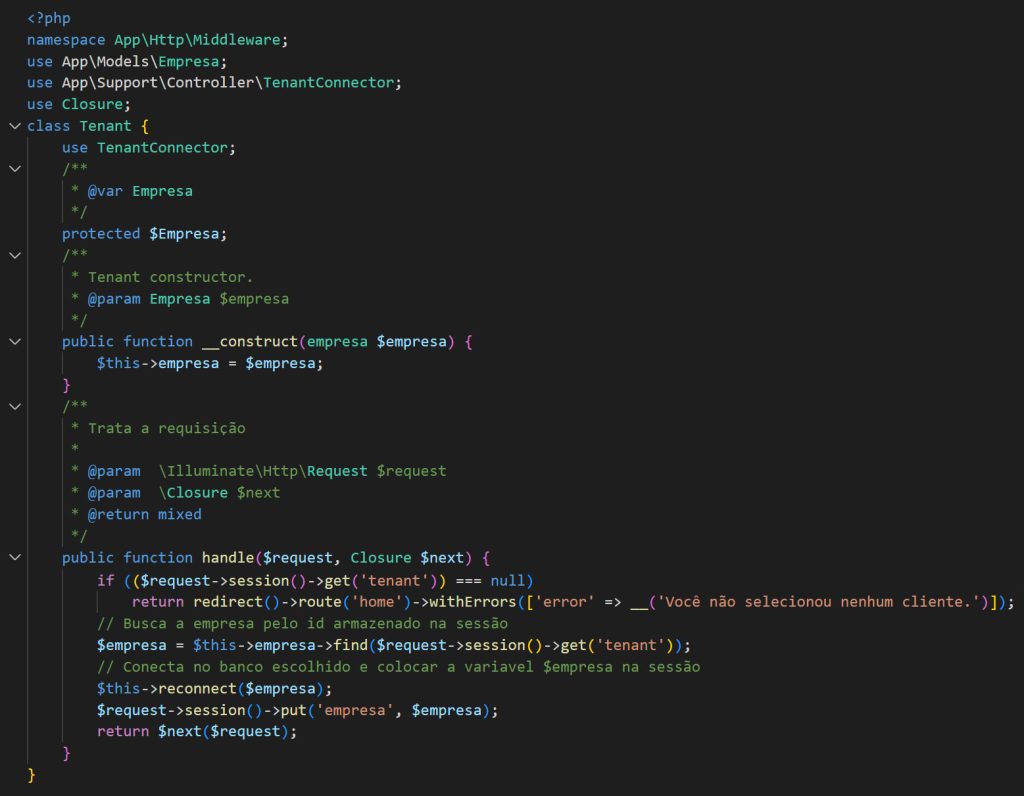
Always ensure the connection exists. Ensure that all routes connect to a tenant’s database using this middleware. In my particular situation, the user would select a customer (tenant) from a list and manipulate that customer’s data, hence the use of the session. But I could easily have two middlewares (WebTenant, ApiTenant) and rely on tokens to choose a tenant connection as well.
TenantConnector (A Trait)
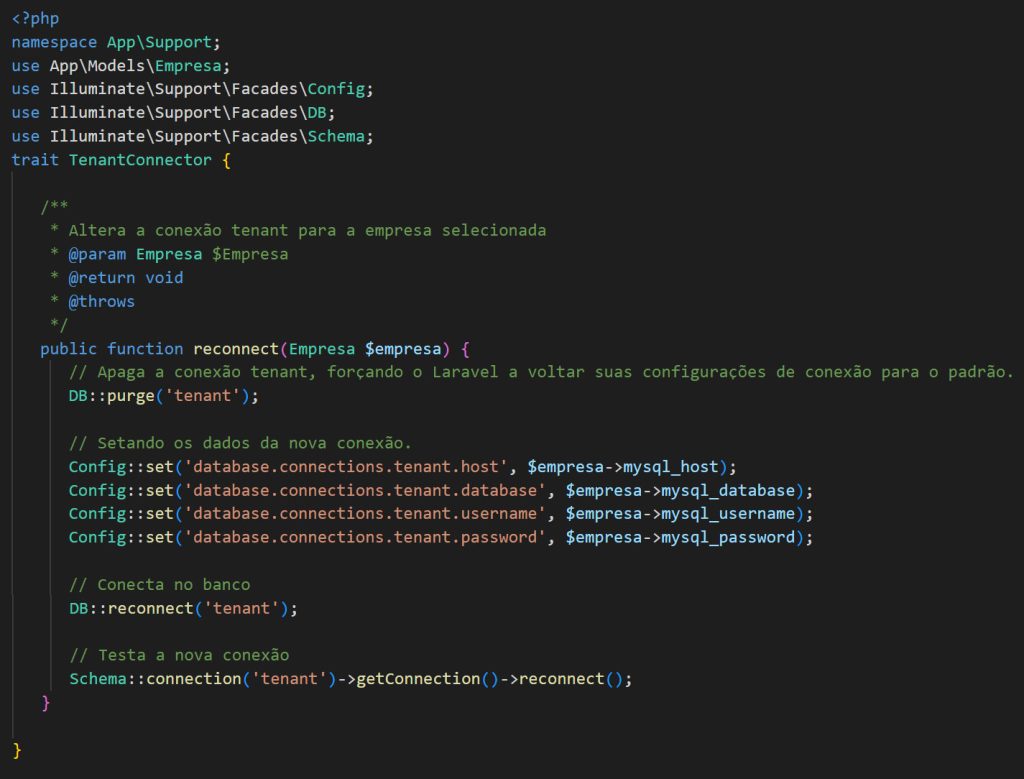
Not much to talk about here, just your tenant connection defined.
The Models
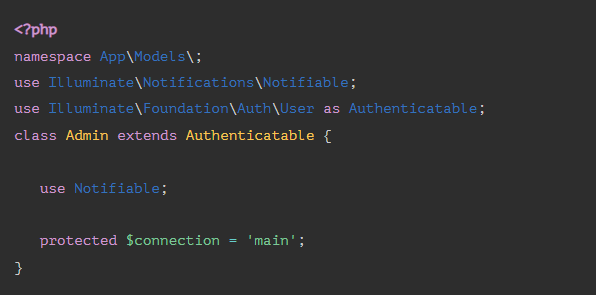
A main model will have the main connection and nothing else.
The Company model (customer/tenant) was different. I used the Trait TenantConnector and wrote the connect() method. This allows me to do things like Company:: find($id)->connect();
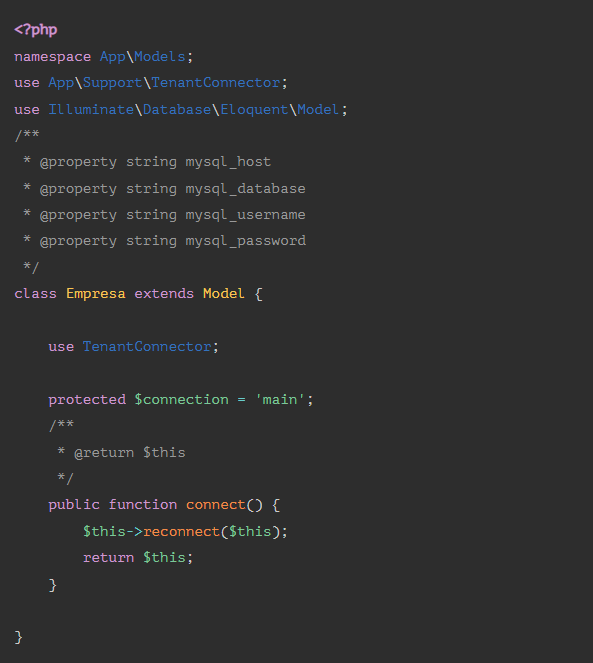
A Tenant Model will only use the tenant connection.

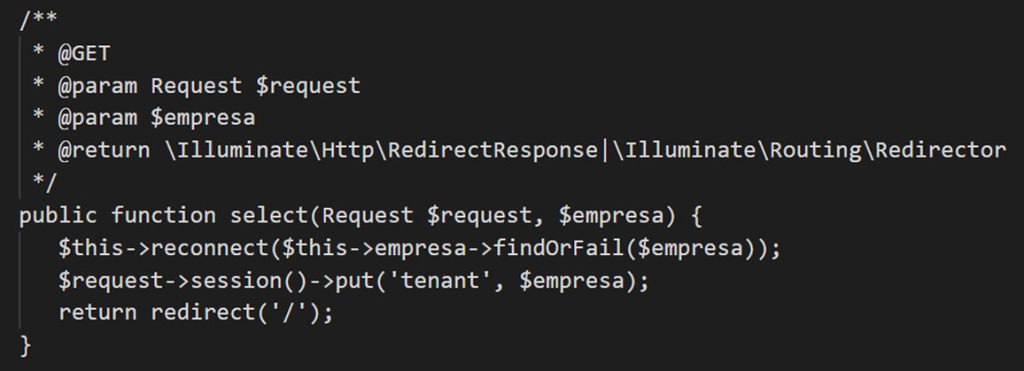
The last thing would be the SelectTenantController, to let you define the session the middleware expects.
Conclusion
Laravel makes it easy to have two connection setups. Routes will connect to a specific database and can easily have middleware to ensure the connection exists. You can easily choose the connection for each Model (or have a MainModel/TenantModel and extend them). Everything is set up, and you have a Laravel application capable of connecting to multiple databases.















Leave a comment