


If you didn’t know, it is not necessary for an Amazon Echo device to develop skills for your platform, but if you are interested in acquiring one, I have the third generation, and you can use this link to get one for yourself. It’s useful for taking routine questions (including language ones), creating reminders, and playing music, using only voice commands. I occasionally use it for gaming with my family as well.
Another thing you may not know is that generally the creation of skills, which are Alexa’s “apps”, is done using AWS serverless resources, called AWS Lambda, and that I already taught how to use in another tutorial here on the blog and this course. This makes a lot of sense, as 99% of the time your Alexa won’t be running that skill, and therefore, it wouldn’t make sense to have a VPS for this application. We are going to use Node.js, but know that you can use any web technology you know that “speaks” HTTP.
But what are we going to do?
How about a skill that allows Alexa to give you the current cryptocurrency quote? Cool, isn’t it?
For this, we will use the public APIs of Binance, the largest cryptocurrency exchange in the world, which I have already taught how to create bots here on the blog on other occasions.
Although I have already defined the example we can do, feel free to adapt it to your reality. I promise to do something useful and adaptable to other contexts, different from the generic “hello world” tutorials.
The parts of this tutorial are:
If you prefer to watch instead of reading, you can follow this entire tutorial in the video below.
1 – Creating the Project
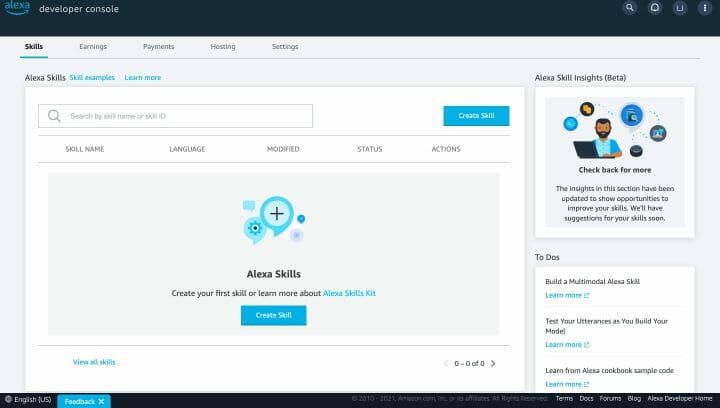
To be able to do this tutorial you will need to have an Amazon developer account, which you can create for free at this link. After creating your account, you will land on the panel below where you can develop your skills, but we will not create for him, follow me.
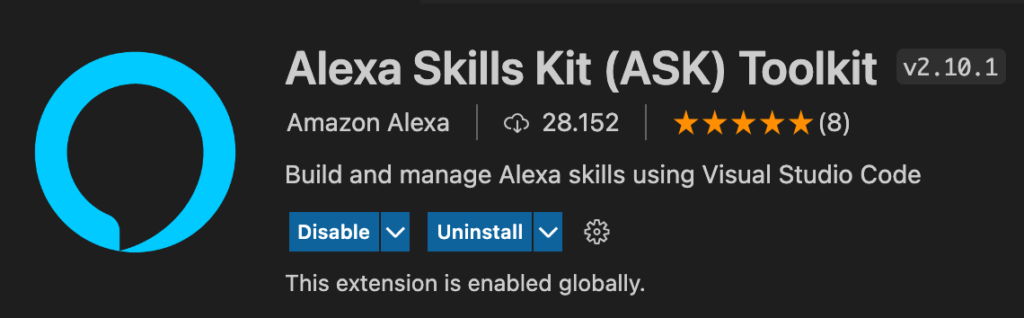
How about installing the development extension for Alexa in VS Code? So you can manage and code by it too. Look under the Extensions tab for the Alexa Skills Kit Toolkit and install it.
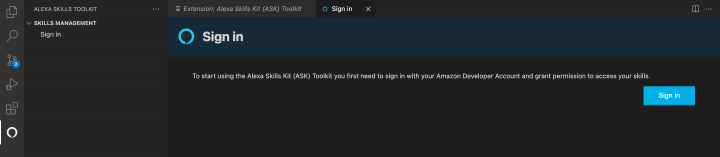
After installation, you may need to restart VS Code. Do that, and a new option will appear in the sidebar, which you can click to authenticate to your AWS Developer account that you just created. Note that a series of permissions will be requested, only give them if you recognize that you have installed the correct extension created by Amazon, which I have printed above.
Now use the Create Skill option and on the next screen configure the name of your skill (this is the public name that will appear to users), the language, the model (custom), and the hosting method, which we will use here “ Alexa-hosted Node.js”.
In this method, we won’t worry about the application infrastructure behind the skill and we won’t even need an AWS account. We won’t even have to pay for this service, within usage limits, but quite generous in my opinion. We’re just going to code and upload our code to AWS, and it’s going to take care of making sure it runs every time a user calls your skill. This is the most recommended way to create, only using the most complex for large and famous skills.
The hosting region is relatively irrelevant. I usually use N. Virginia, and the last field is the directory on your machine where the local repository will be created (the remote one is in AWS itself, in a git service called Code Commit). Set these last settings and have your skill created.
The creation process takes a few minutes, and when it finishes, the project will be open in VS Code with several example codes in a lambda folder.
2 – Testing the Project
Every time you change these sources and push, your code will be uploaded to the server and will be available in the development environment, so you can do that now. After the push is finished, go back to the Developer Console, and in the Code tab you will be able to see if the build is still happening.
This project comes configured with a hello world, so that’s the one we’re going to test first to understand how everything works and then modify it. While the first build is going on, take a look at the pt-BR.json file that is inside skill-package/interactionModels/custom, or in the Developer Console go to Build tab > Invocations > Skill Invocation Name and see the invocation command of your skill. In my case it was “change me”, and I switched to “open cryptocurrencies”. You can switch to any combination of two or more words, but if using VS Code, don’t forget to commit and push. Whatever you decide, keep this invocation sentence.
{
“interactionModel”: {
“languageModel”: {
“invocationName”: “abrir criptomoedas”,
“intents”: [
{
“name”: “AMAZON.CancelIntent”,
“samples”: []
},
{
“name”: “AMAZON.HelpIntent”,
“samples”: []
},
{
“name”: “AMAZON.StopIntent”,
“samples”: []
},
{
“name”: “HelloWorldIntent”,
“slots”: [],
“samples”: [
“hello”,
“how are you”,
“say hi world”,
“say hi”,
“hi”,
“say hello world”,
“say hello”
]
},
{
“name”: “AMAZON.NavigateHomeIntent”,
“samples”: []
}
],
“types”: []
}
},
“version”: “1”
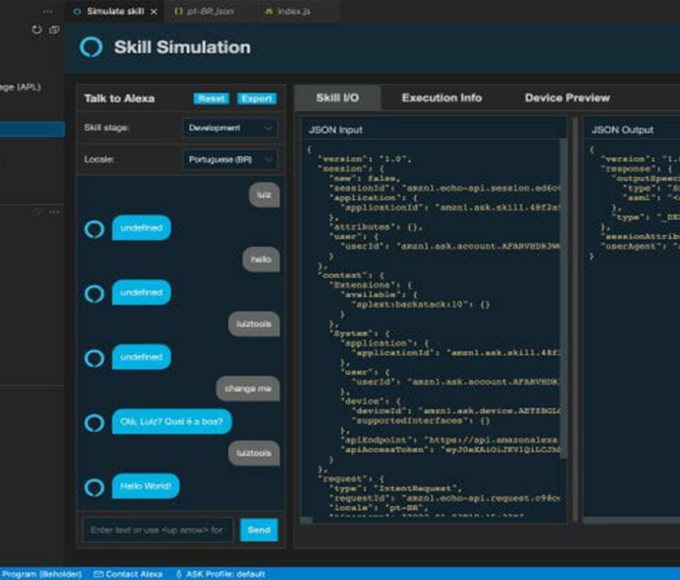
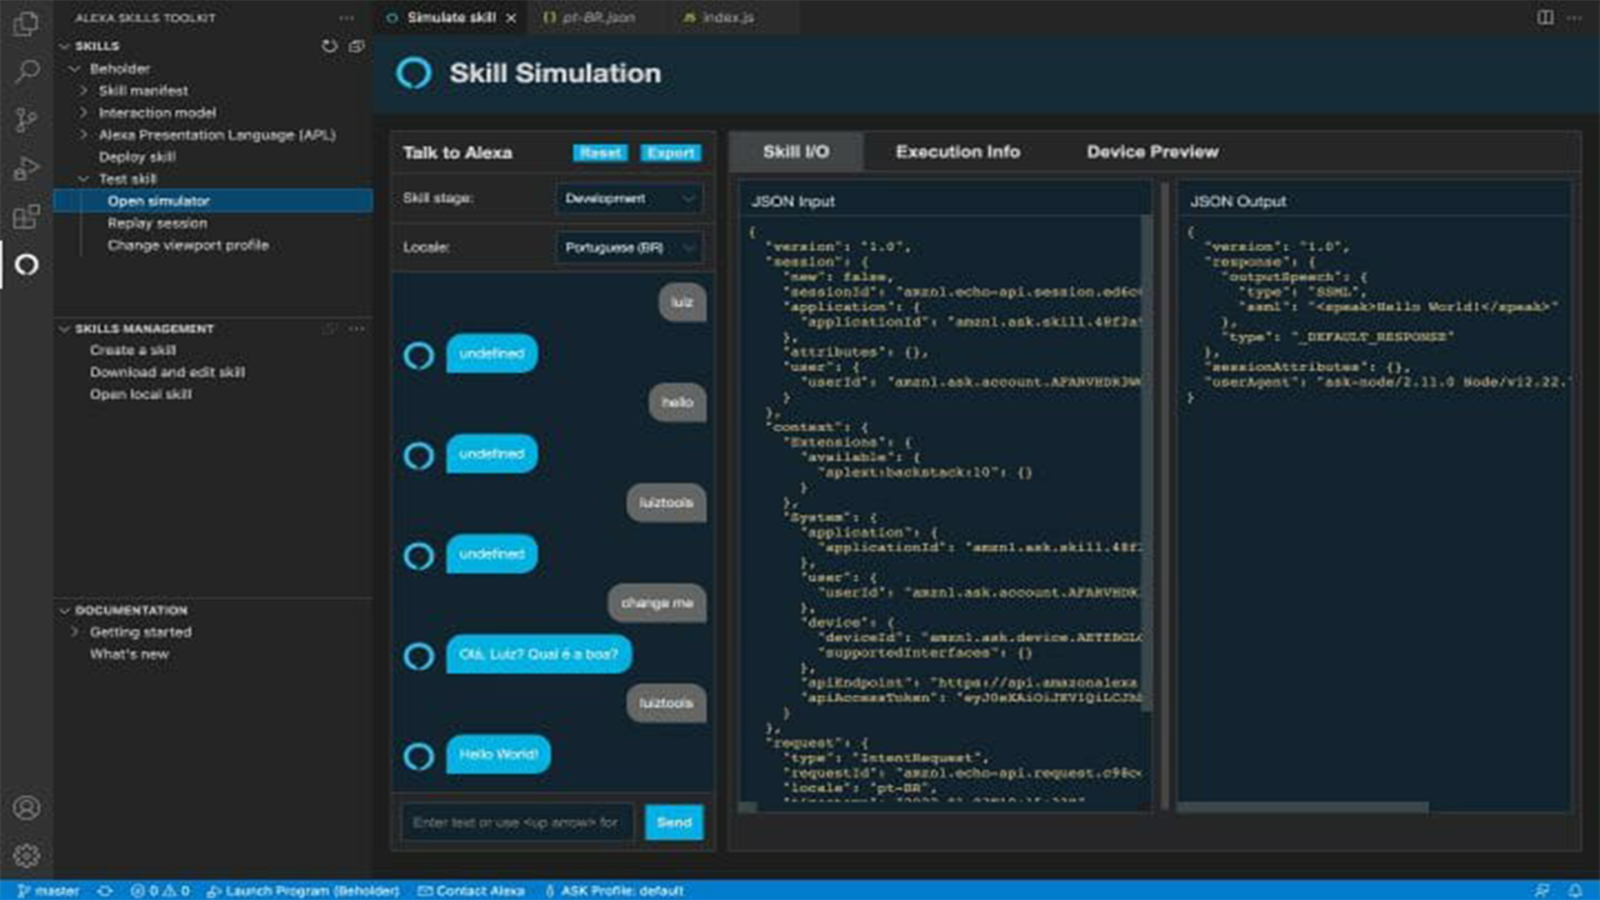
}After the build finish (if it doesn’t start by itself after a push, you can manually start the deployment in the Code tab of the Developer Console), go to the Test tab of the Developer Console and select the development environment so we can do a quick test.
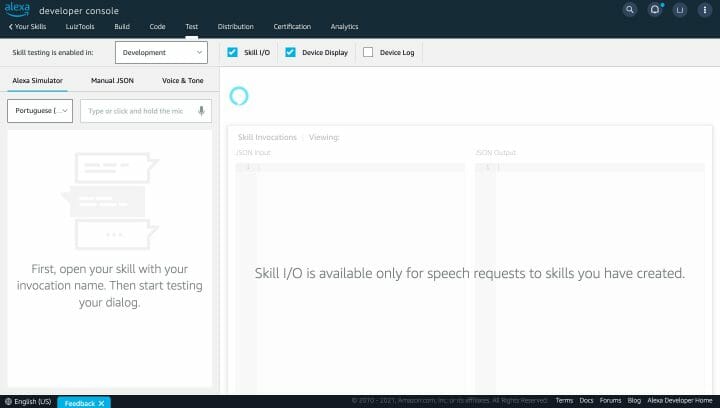
In the left column, you have a chat to interact with the Alexa simulator, with which you can send text and voice messages, and she will respond to you by voice and text as well. Try typing (or speaking, holding the microphone icon) your skill’s activation phrase, and it will be activated.
This initial Alexa behavior is triggered every time you speak the invocation phrase, which is defined by the LaunchRequestHandler present in the lambda/index.js file. Try changing the speakOutput const string and deploy again to see that Alexa will change the skill’s initial phrase. I will bring the phrase into our cryptocurrency context.
const LaunchRequestHandler = {
    canHandle(handlerInput) {
        return Alexa.getRequestType(handlerInput.requestEnvelope) === ‘LaunchRequest’;
    },
    handle(handlerInput) {
        const speakOutput = ‘Olá, qual criptomoeda você quer saber a cotação atual?’;
        return handlerInput.responseBuilder
            .speak(speakOutput)
            .reprompt(speakOutput)
            .getResponse();
    }
};
You will notice that after this welcome phrase that Alexa says, she expects a response from you. The LaunchIntentHandler has that “reprompt” call on the penultimate line of code. While the speak function tells Alexa to say something, the reprompt function tells her to “listen” for an answer. Based on this response, Alexa will look in its Interactions Model file for some intention associated with the phrase the user just said.
If it finds a phrase, it will trigger the respective intent handler. Notice below how the HelloWorldIntent handler is prepared to be triggered with several phrases (inside the samples array).
{
  “name”: “HelloWorldIntent”,
  “slots”: [],
  “samples”: [
    “hello”,
    “how are you”,
    “say hi world”,
    “say hi”,
    “hi”,
    “say hello world”,
    “say hello”
  ]
},
That is if the user says any of these phrases, the handler of the same name in the project code will be triggered. In addition to the web console, another option you have to test your changes, a little more limited, is within VS Code itself, going to the Alexa tab and choosing the “Test Skill” option, which will open a simulator inside of VS Code that allows only text input and output.

Understanding what happens when the invocation phrase is said and how the hello world intent is activated, let’s change our interaction model to capture what the user says.
3 – Capturing the Input
Whether we send messages to the user or capture responses from him, everything goes through the intentions, and the intentions are defined in the interaction model. To create the interaction model you can edit the JSON file in your entire project manually, but I prefer to use the visual editor available in the Developer Console. If you want to do it like I did, go to the Developer Console, on the Build tab, menu Interaction Model > Intents. The panel will list the intents mapped to this application, and I recommend that you select HelloWorld as we are going to modify it.
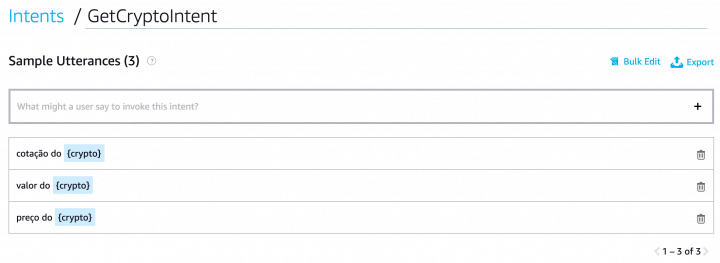
Note that I changed the name from HelloWorldIntent to GetCryptoIntent, since its purpose will be to capture the cryptocurrencies that the user wants to know the quotation. In Sample Utterances, you delete the existing ones and place the activation phrases of this intent, and when we want to capture a part of this phrase as if it were a variable, we use it between braces as in the image above.
In our example, when the skill is invoked, Alexa will ask which cryptocurrency the user wants to quote. When he responds to one of the above sentences, he will understand that the intention is GetCryptoIntent and will execute a code that we can define, using the variable between braces as a code parameter.
Add as many samples as you want, the more, the merrier as it makes your skill smarter. In the example above, my user can say “btc quote”, “eth value” or even “mana price”. These are all valid phrases and will be understood as GetCryptoIntent, with btc/eth/mana being captured as phrase variables.
The technical name for these skill variables is slot, and every slot is identified by its unique name and must have a defined type. As we are going to use a generic string, the recommended type is AMAZON.SearchQuery, as below.

With these changes made, our interaction model is ready, and we must turn our attention to the code so that it can handle everything we’ve done. The first thing you should know is that when we use the interaction model’s visual editor the changes don’t end up in our code automatically. Still using the visual editor, go to the Interaction Model > JSON Editor menu and copy the JSON code of your interaction model, using it to replace the content of the pt-BR.json file in your skill project in VS Code.
It should look like below.
{
    “interactionModel”: {
        “languageModel”: {
            “invocationName”: “abrir criptomoedas”,
            “intents”: [
                {
                    “name”: “AMAZON.CancelIntent”,
                    “samples”: []
                },
                {
                    “name”: “AMAZON.HelpIntent”,
                    “samples”: []
                },
                {
                    “name”: “AMAZON.StopIntent”,
                    “samples”: []
                },
                {
                    “name”: “GetCryptoIntent”,
                    “slots”: [
                        {
                            “name”: “crypto”,
                            “type”: “AMAZON.SearchQuery”
                        }
                    ],
                    “samples”: [
                        “cotação do {crypto}”,
                        “valor do {crypto}”,
                        “preço do {crypto}”
                    ]
                },
                {
                    “name”: “AMAZON.NavigateHomeIntent”,
                    “samples”: []
                }
            ],
            “types”: []
        }
    }
}
Now we have to tweak our lambda’s index.js, as we’ve drastically changed HelloWorldIntent, turning it into GetCryptoIntent. Not only do we have to adjust these names, but we can capture the {crypto} slot to use it in our skill’s logic. Initially, let’s make Alexa respond to the same crypto she heard, just to make sure we’re capturing the slot correctly. Later we will use this information more usefully.
Adjust your HelloWorldIntentHandler to look like this.
const GetCryptoIntentHandler = {
    canHandle(handlerInput) {
        return Alexa.getRequestType(handlerInput.requestEnvelope) === ‘IntentRequest’
            && Alexa.getIntentName(handlerInput.requestEnvelope) === ‘GetCryptoIntent’;
    },
    handle(handlerInput) {
        const crypto = handlerInput.requestEnvelope.request.intent.slots.crypto.value;
                return handlerInput.responseBuilder
                    .speak(‘Você disse ‘ + crypto)
                    .getResponse();
            })
    }
};
In the code above, I not only changed the Handler name and condition inside canHandle, but mostly captured the crypto slot inside the handle logic and changed Alexa’s response to tell crypto she just heard. One last tweak is needed for this file to work as expected.
At the end of the same index.js, adjust the export code to replace the old HelloWorldIntentHandler with GetCryptoIntentHandler.
exports.handler = Alexa.SkillBuilders.custom()
    .addRequestHandlers(
        LaunchRequestHandler,
        GetCryptoIntentHandler,
        HelpIntentHandler,
        CancelAndStopIntentHandler,
        FallbackIntentHandler,
        SessionEndedRequestHandler,
        IntentReflectorHandler)
    .addErrorHandlers(
        ErrorHandler)
    .withCustomUserAgent(‘sample/hello-world/v1.2’)
    .lambda();
Once done, commit the code, push it, wait for the build to finish, and test the skill again.
4 – Querying API
You will now be able to interact with Alexa by going to the Test tab in the Developer Console. When the skill starts (by invocation name), Alexa will ask you which cryptocurrency you want to know the quote. You will respond using one of the sample utterances and it will respond by confirming the cryptocurrency you quoted, which indicates that it was able to capture the slot correctly.
But of course, you don’t want to make an “echo” skill, which repeats what you say. You want Alexa to use the information captured in the user’s response to do something useful, right?
I thought here that it would be cool for her to query some public API and bring me the updated quotation of the cryptocurrency that the user requested. For this, we will use Binance REST APIs, the world’s largest cryptocurrency exchange. But don’t worry, it’s a public API that doesn’t require registration and therefore costs nothing. Still, if you want to substitute any other public API, feel free to do so.
Going back to the suggested API, whose documentation you can find in this link, we can easily query the average price of a currency pair using a string like below.
https://api.binance.com/api/v3/avgPrice?symbol=BTCUSDT
Notice the currency pair in capital letters at the end of the URL. This is how you have to pass it, and if you paste this URL into the browser, you will see that it returns a JSON object with price information, which is what interests us. What we have to do in our code is an HTTP call to this address, passing the cryptocurrency that the user entered + USDT (replace the second currency with BRL if you want the quote in Reais).
The first step to requesting a REST API is to have an HTTP client in your Node.js application. I’ll be using Axios, which is a popular HTTP client. To install Axios in your project is very simple: open the command line terminal and navigate with cd to the lambda folder. Inside it, run the following installation command.
npm i axiosOnce you have Axios installed, now open index.js and modify your GetCryptoIntentHandler again so that it makes an HTTP call using Axios to the URL I mentioned before, taking the price from the return and sending it to Alexa to say the quote, like below.
const GetCryptoIntentHandler = {
    canHandle(handlerInput) {
        return Alexa.getRequestType(handlerInput.requestEnvelope) === ‘IntentRequest’
            && Alexa.getIntentName(handlerInput.requestEnvelope) === ‘GetCryptoIntent’;
    },
    handle(handlerInput) {
        const crypto = handlerInput.requestEnvelope.request.intent.slots.crypto.value;
        const axios = require(‘axios’);
        return axios.get(`https://api.binance.com/api/v3/avgPrice?symbol=${crypto.toUpperCase()}USDT`)
            .then(response => {
                const price = parseFloat(response.data.price).toFixed(2).replace(“.”, “,”);
                const speakOutput = `O preço de ${crypto} atualmente é $${price}`;
                return handlerInput.responseBuilder
                    .speak(speakOutput)
                    .getResponse();
            })
            .catch(err => {
                const speakOutput = `Houve um erro: ${err.message}`;
                return handlerInput.responseBuilder
                    .speak(speakOutput)
                    .getResponse();
            })
    }
};
In the example above, right after capturing the slot and storing it in the crypto variable, I loaded Axios and told it to do an HTTP GET to get the return of the provided URL, where I concatenate the uppercase crypto (toUpperCase) with USDT. As Axios works with asynchronous requests, I have to treat the Promise returned with then and catch.
In case of success, the then code will be executed and in it, I format the price that came in response.data to have only two decimal places, separated by a comma. This information is used to assemble Alexa’s response phrase, where I also put a dollar sign in front of it so that she understands that it is a monetary value.
In case of an error, I tell Alexa to read the error for me too.
After committing, pushing, and waiting for the build, the result is surprising because Alexa is now able to respond to the quotation of any cryptocurrency operated on Binance quickly and assertively, and the coolest thing: everything is controlled by your voice!
In the future, if you wish, you can publish this skill on the Amazon store through the Developer Console itself, just by filling out a form. To use this skill in production, you’ll need to own one of the awesome Amazon Echo devices.
So that’s it, I hope you enjoyed this tutorial and that you implemented it in practice, either strictly or following the same ideas and changing whatever you want. If you have any questions, leave them in the comments at the end of this post, and if you want to download the sources, there is a form at the end of the post as well.
A hug and success!
*The content of this article is the author’s responsibility and does not necessarily reflect the opinion of iMasters.


Leave a comment