The terminal is probably the tool I use the most in my day-to-day life. Over the years, I’ve created a series of shortcuts, scripts, and habits that make me more productive in performing many of my tasks. In this post, I will tell you some of the things I’ve set up and been using to inspire someone else to take the time to do the same.
The shell
The shell is the interface we interact with when we open a terminal session. For decades the default shell for the majority of Linux distributions and macOS was good old bash, but in recent years some competitors have gained prominence. Perhaps most relevant is zsh, which is now the default for macOS and many Linux distros. I used zsh for some time, but I discovered fish in a tweet by Carlos Becker. I tried it and never looked back. Fish is lighter and faster than zsh (empirical fact, it’s my impression as I haven’t done or read benchmarks), and comes with lots of useful built-in features like faster auto-complete, wildcards for navigating directories, etc.
Hint: since macOS defaults to zsh, I ran the following command to install fish:
brew install fishAnd the command to set it as my default shell
chsh -s /opt/homebrew/bin/fishSaving the settings
In Unix derivatives (Linux and macOS for example) one way to maintain application configuration is using dotfiles, which are files that start with a . in the name. The most interesting thing about this is that it’s easy to make changes and backups of your settings. What I do is keep these files on a cloud service like Dropbox and configure my machine to use these files using the symbolic links feature.
These are some of my machine’s configuration files:
To facilitate the creation of these files, I created a script that I use whenever I need to change computers:
cd ~
ln -s /Users/eminetto/Dropbox/dotfiles/aws .aws
ln -s /Users/eminetto/Dropbox/dotfiles/.gitconfig .gitconfig
ln -s /Users/eminetto/Dropbox/gnupg/ .gnupg
ln -s /Users/eminetto/Dropbox/ssh/ .ssh
ln -s /Users/eminetto/Dropbox/dotfiles/sshw .sshw
ln -s /Users/eminetto/Dropbox/dotfiles/fish .config/fish
This way, I quickly have the settings applied to my main apps.
Shortcuts
Another powerful feature to use in the terminal is creating shortcuts or aliases. As the name suggests, they are shortcuts to commands that speed up your productivity. These are some of the shortcuts I currently have on my fish:
❯ alias
alias cot 'open /Applications/CotEditor.app/'
alias d docker
alias dc 'docker compose'
alias dcdown 'docker compose stop'
alias dcup 'docker-compose up -d'
alias g git
alias icloud cd\\ /Users/eminetto/Library/Mobile\\\\ Documents/com\~apple\~CloudDocs/
alias k kubectl
alias kb kubectl
alias ls 'ls -G'
alias open-ports netstat\\ -anvp\\ tcp\\ \|\\ awk\\ \\'NR\\<3\\ \|\|\\ /LISTEN/\\'
alias py3 python3
alias subl /Applications/Sublime\\\\ Text.app/Contents/SharedSupport/bin/subl
To save an alias in fish just run:
alias -s icloud="cd xxx"And the configuration is saved in the ~/.config/fish directory. Each shell has a command for this. I recommend researching how to do this in yours.
Another place you can add shortcuts is in the ~/.gitconfig file. These are some that I created:
[alias]
cleanup = "!git fetch --all --prune; git branch --merged origin/master | grep -v \"\*\" | grep -v \"\ master\" | xargs -n 1 git branch -d"
s = status
d = diff
co = checkout
br = branch
c = commit
This way I can combine fish’s alias with git’s and instead of typing:
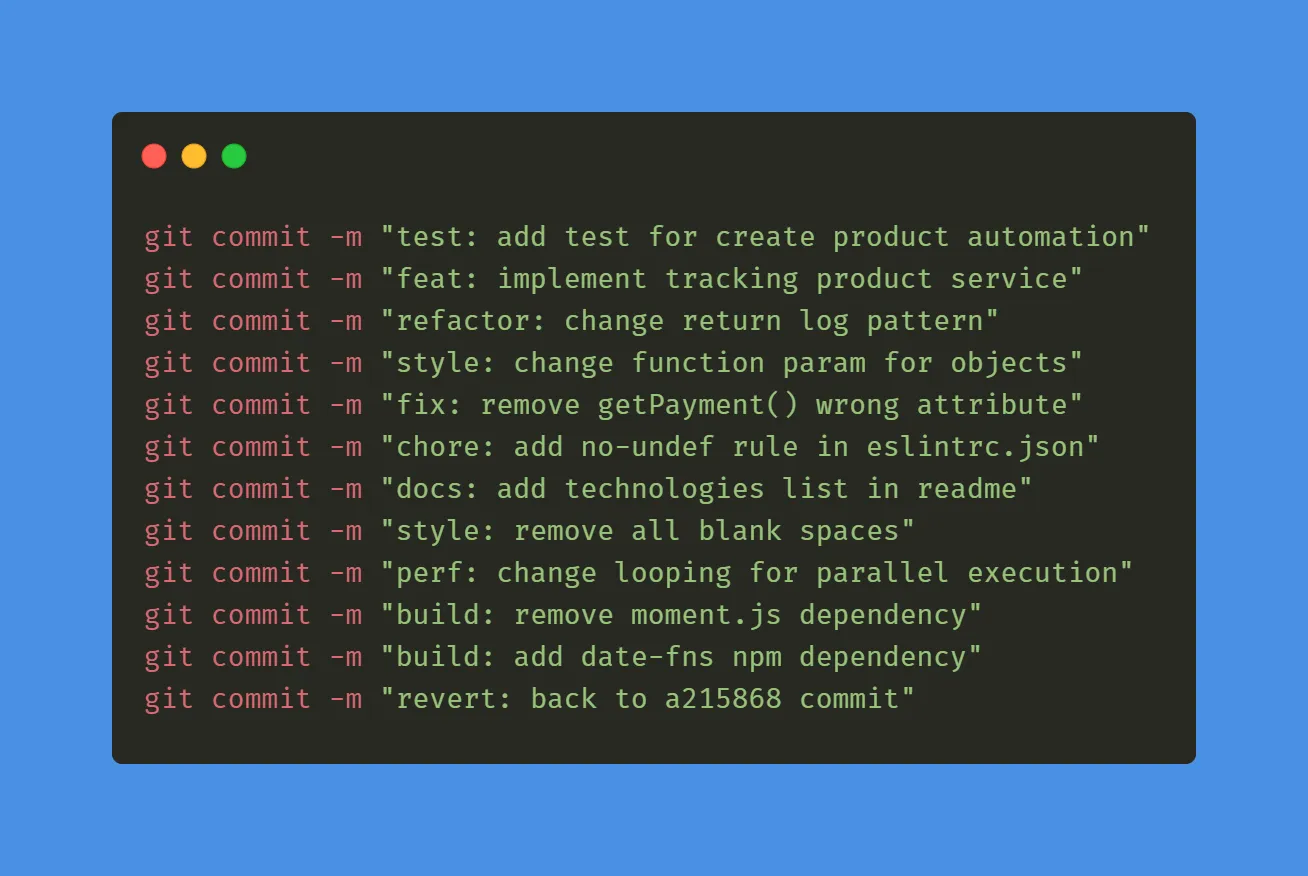
git commit -m "message"Just run:
g c -m "message"And I get a few seconds with each command 🙂
A git-related tip that I’m using is setting up 1Password to sign my commits. In this documentation, you can see how to do this.
Customizing the prompt
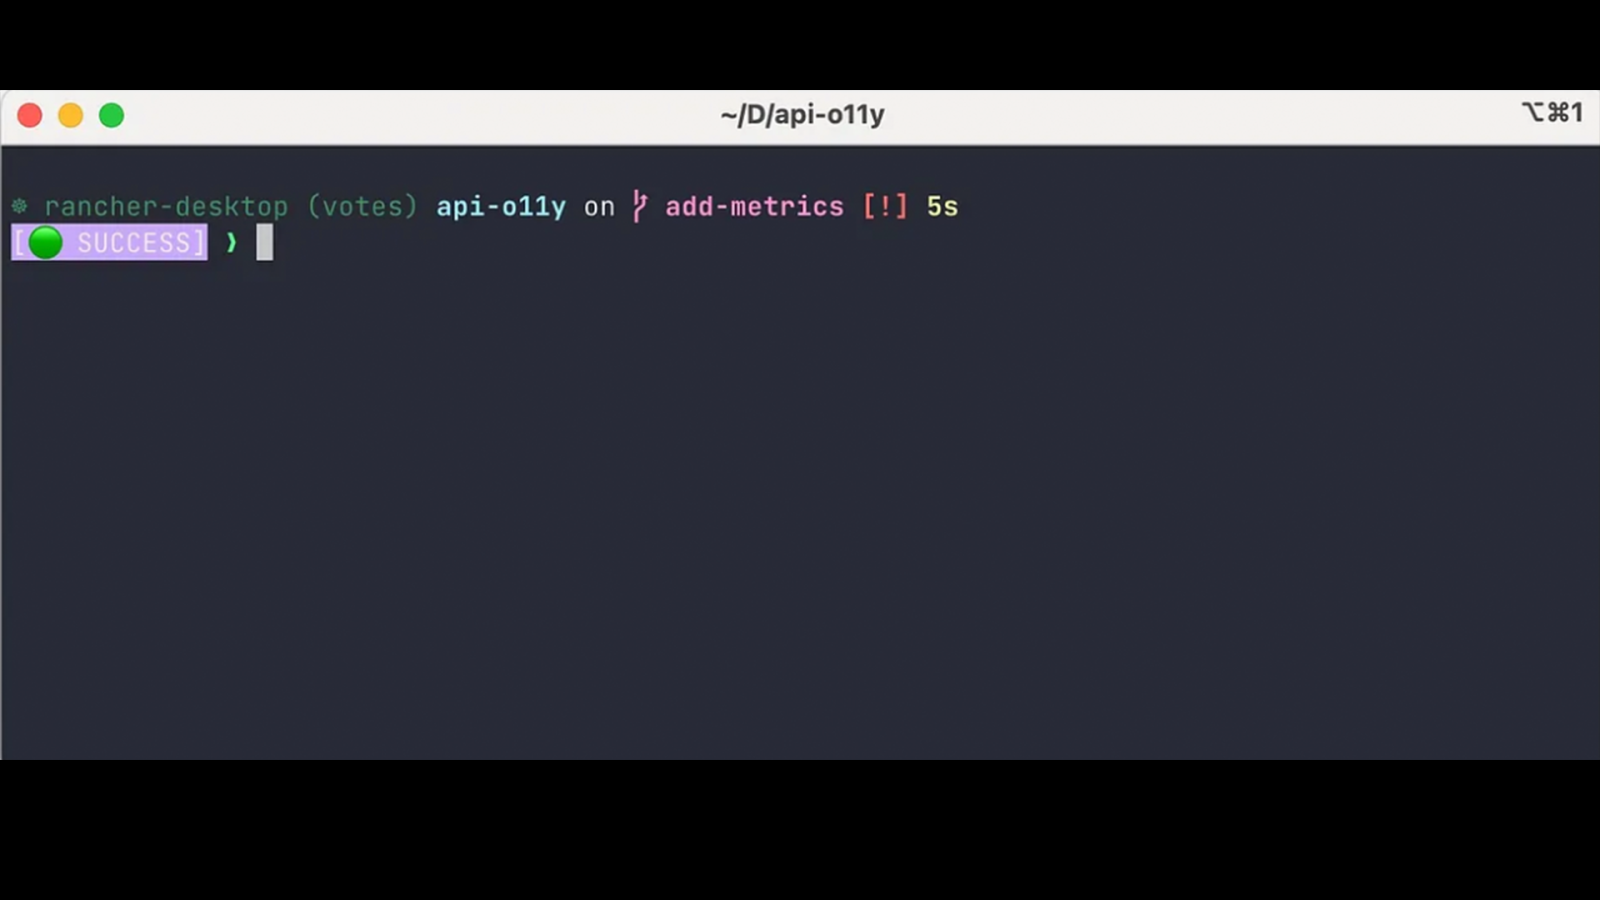
As I commented at the beginning of this post, the shell is the interface with which we interact with the operating system. And interfaces should be user-friendly and beautiful. One way to achieve this is by using a tool that allows customizations, and the tip I want to leave here is Starship. It is an application made in Rust that can be used in any shell to allow customization of the prompt, which is the input where we type the commands. Installation and configuration are simple, as stated on the project’s home page. Once installed, just configure the ~/.config/starship.toml file. For example, the configuration:
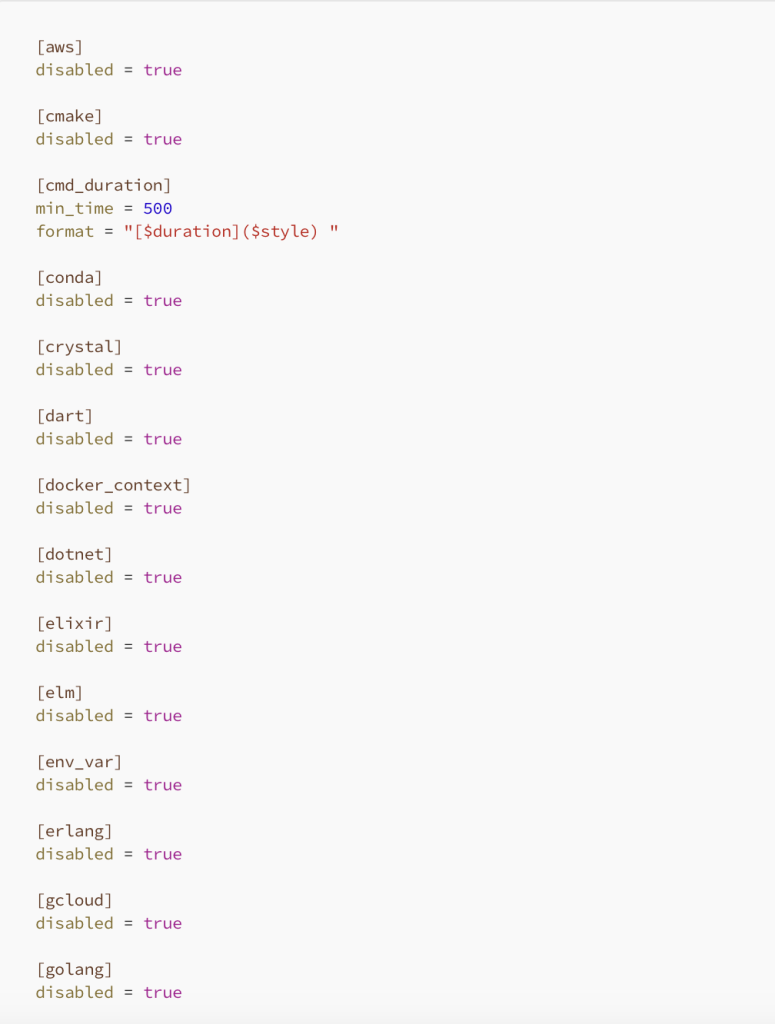
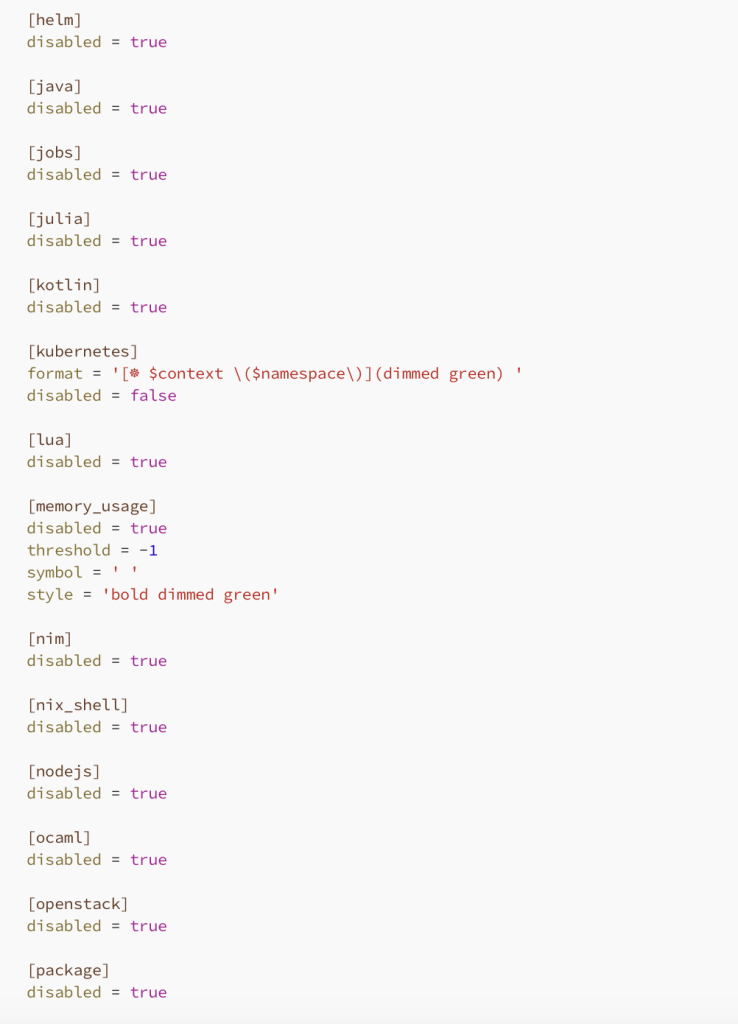
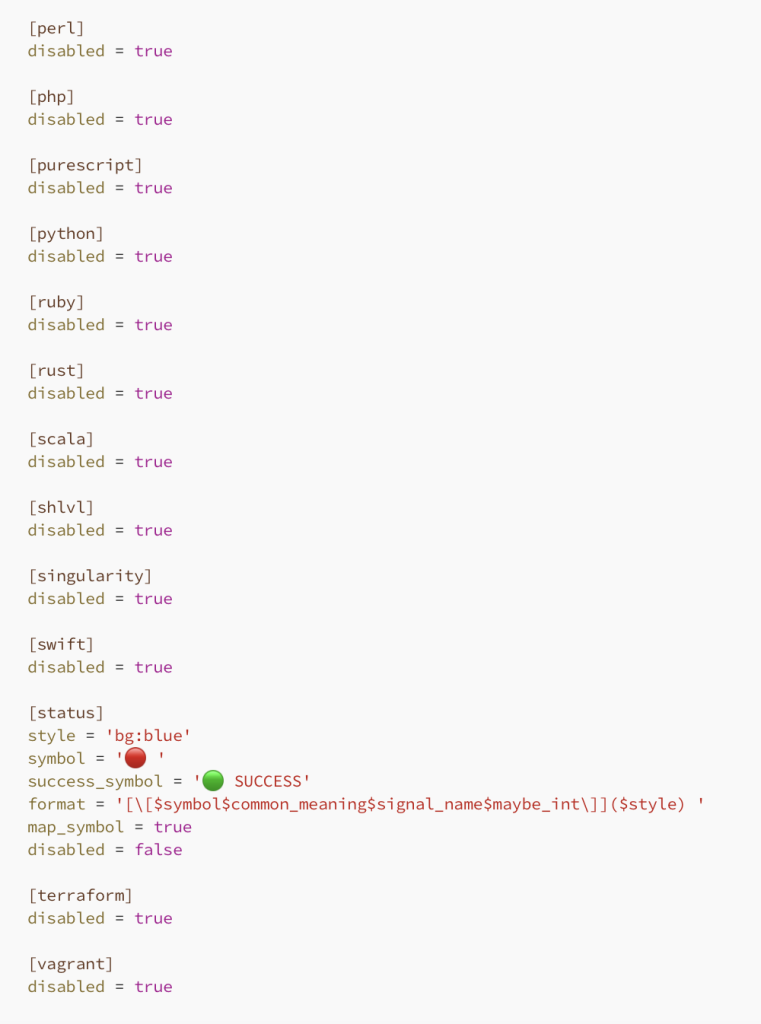

It generates the following visual in my terminal:

So, in the picture:
-> rancher-desktop is the name of the Kubernetes cluster I’m connected to
-> votes is the name of the Kubernetes namespace
-> api-o11y is the directory name where I am
-> add-metrics is the git branch name
-> [!] indicates that there have been changes in the current branch, the equivalent of a git status
-> 5s is the time it took to execute the last command
-> ? SUCCESS indicates that the last command I executed ended successfully.
In the Starship documentation, it is possible to see all the possible configurations.
I hope these tips help and inspire you to take the time to customize and optimize your terminal. I guarantee it will be fun and improve your performance daily. Enjoy and share your tips too, I would love to add new tricks to my workflow ?
*The content of this article is the author’s responsibility and does not necessarily reflect the opinion of iMasters.













Leave a comment