


In .NET 6, when we create an ASP.NET Core Web API project by default, we can use or not controllers. We can also integrate the Open API. The Swagger interface in our project automatically.
When we integrate Swagger into our Web API project, we only get the basic interface without any more detailed description for our API.
Swagger/Open API
Swagger is a language-independent specification for describing REST APIs, also known as OpenAPI. It allows us to understand the capabilities of a service without looking at the actual implementation code.
Swagger minimizes the amount of work required when integrating an API, and likewise, it also helps API developers document their APIs quickly and accurately.
The Swagger specification is an important part of the Swagger flow by default. A document called swagger.json is generate by the Swagger tool, which is based on our API and describes the features of our API and how to access it via HTTP.
The Swagger UI provides a web-based user interface that provides information about the service. It is built using the Swagger spec and built into the Swashbuckle package. Therefore can be hosted in our ASP.NET Core app using middlewares.
Integrating the Swagger UI
We can use the Swashbuckle package to integrate Swagger into our .NET Core Web API projects easily, and it will generate the Swagger spec for our project. Furthermore, Swashbuckle also contains the Swagger UI.
There are three main components in the Swashbuckle package:
-> Swashbuckle.AspNetCore.Swagger: Contains the Swagger object model and middleware for exposing SwaggerDocument objects as JSON.
-> Swashbuckle.AspNetCore.SwaggerGen: A Swagger generator that creates SwaggerDocument objects directly from our routes, controllers, and models.
-> Swashbuckle.AspNetCore.SwaggerUI: An embedded version of the Swagger UI tool. It interprets Swagger JSON to create a rich, customizable experience to describe Web API functionality.
In this article, I will show how we can describe our API and schema in more detail.
Let’s start by creating an ASP .NET Core Web API project called DemoSwagger using the default template and integration with Swagger, where we’ll use Controllers instead of creating minimal APIs.
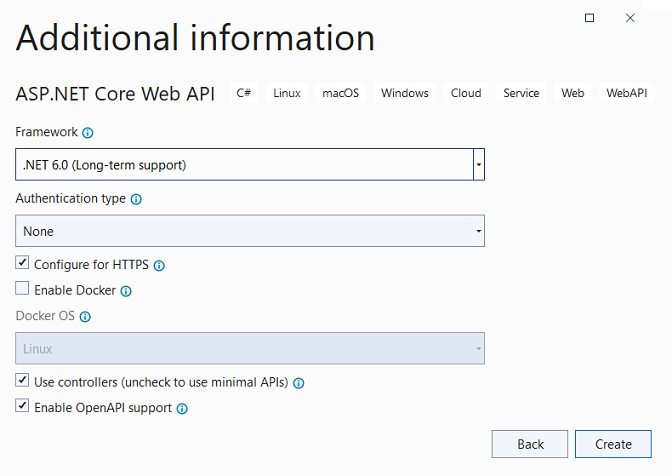
This can be done in Visual Studio 2022 or using the NET CLI with VS Code through the command:
dotnet new webapi -o DemoSwagger
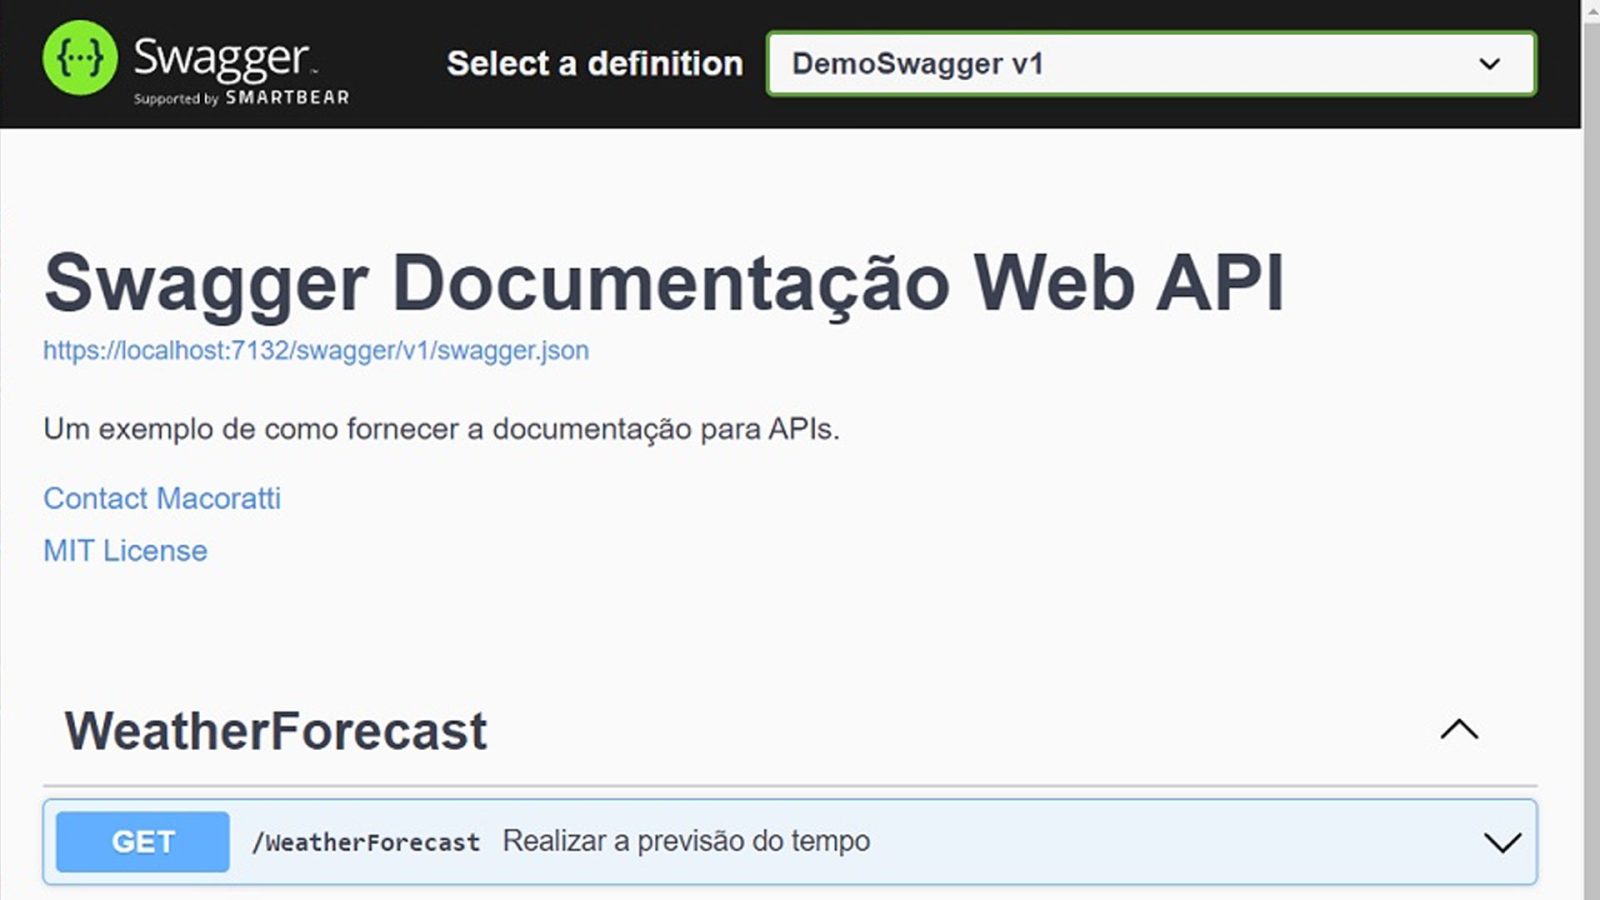
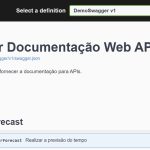
With the project created, we will execute and analyze the default interface for the only endpoint of this project.
In the figure above, I noted some improvements that we can include in the standard interface to better document our API.
With that in mind, let’s start our journey.
Using the XML Documentation
The simplest and most popular way to document APIs is to use XML.
The Swashbuckle library can use the generated XML Documentation and create the appropriate swagger document. Let’s take a look at the example.
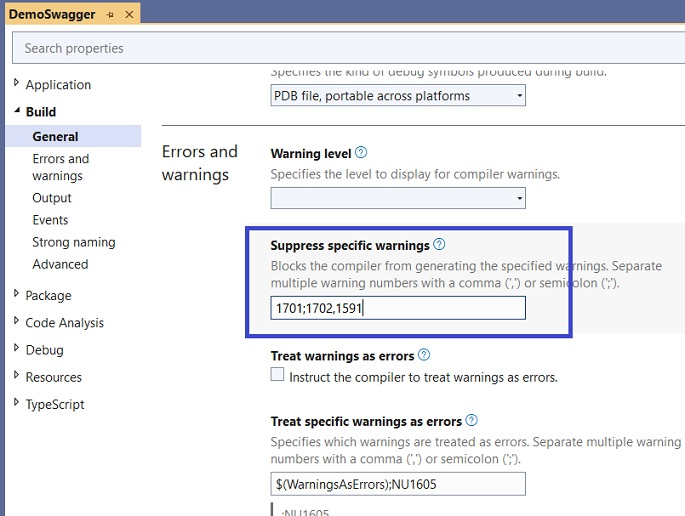
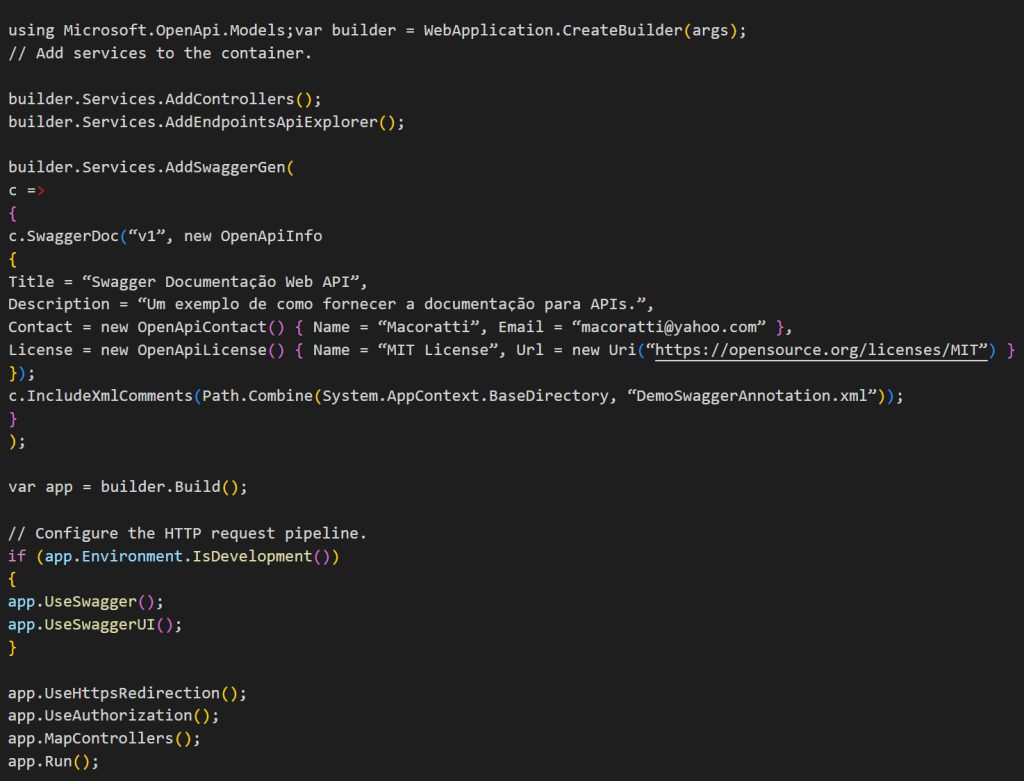
First, we need to make the necessary project settings, and we have to enable XML documentation generation, and also provide an appropriate name for the file.
To do so, open the properties window of the created Project, and on the Build tab, select Output and check the option: Documentation file and then inform the name of the file DemoSwaggerAnnotation.xml:

Note: If you start seeing warning ‘1591’ for missing XML comments, you can suppress this warning.
Next, we need to include the configuration below in the project’s Program file:
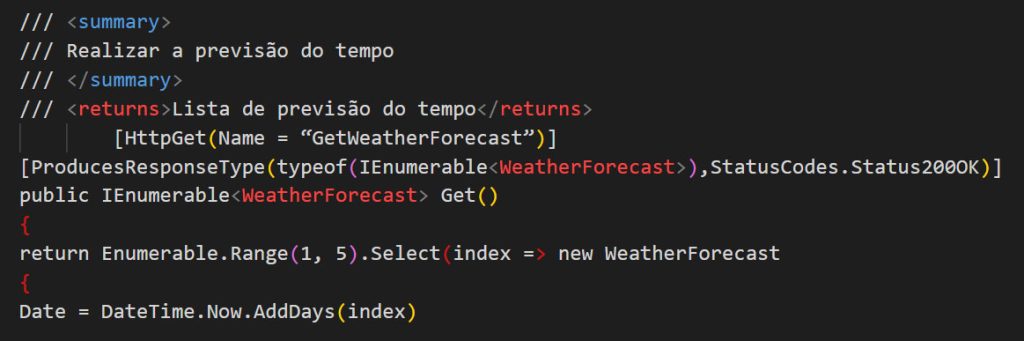
Now let’s provide some documentation for our API by changing the controller’s GetWeatherForecast endpoint code as below:
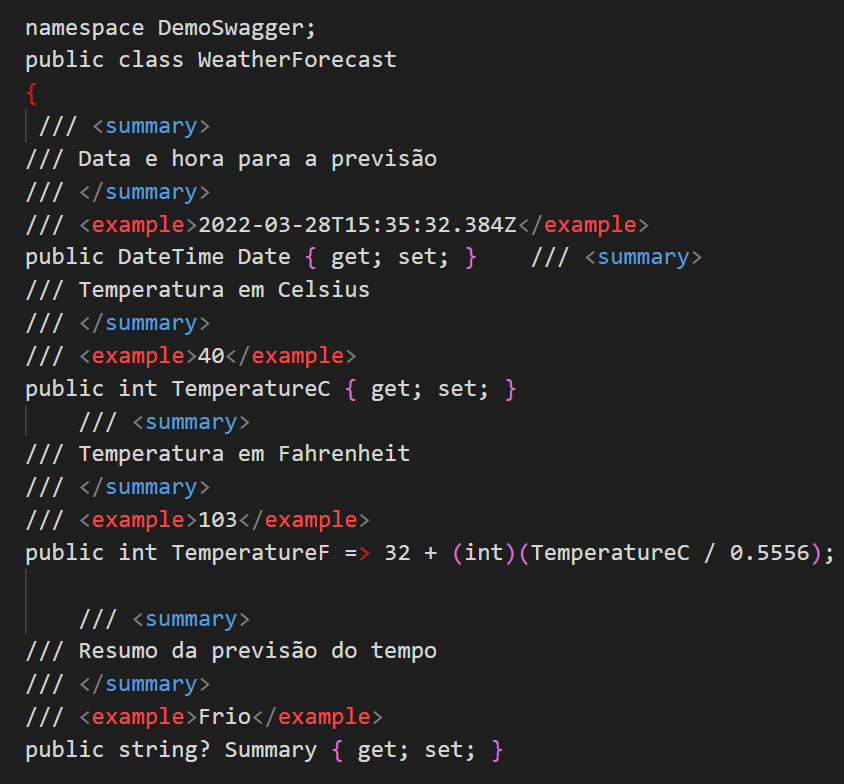
Next, let’s include documentation on the WeatherForecast class used as a domain model in the project:
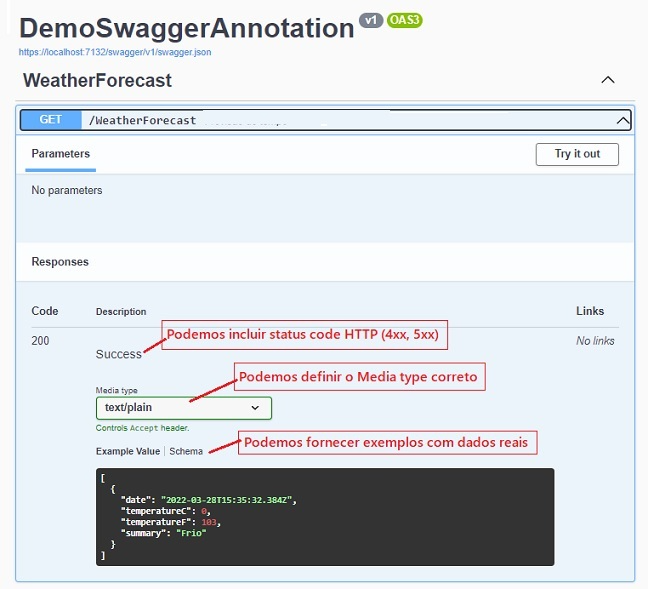
Now let’s run our project and see the result:


Not bad.
We can achieve the same result without generating the XML document file using the Swashbuckle Annotation library and still provide more details about the API.
We will see how to do this in the second part of this article.
Get the project here: DemoSwagger1.zip (without references)
“Be vigilant, stand firm in the faith, be men of courage, be strong.”
1 Corinthians 16:13
*The content of this article is the author’s responsibility and does not necessarily reflect the opinion of iMasters.


Leave a comment