


Axios is, without a doubt, the most popular HTTP client in the JavaScript world, and I dare say it is more popular even than the native fetch API. Extremely practical and efficient, with just a few lines of code, you can implement that REST API call that your system needs with a small load on the application.
If you don’t know anything about Axios and want to learn the basics, the video below can help.
Like all HTTP clients, you can use it on your backend or front end as needed, but it’s a good idea to have some knowledge of HTTP first. However, just as popular as using Axios is iterating code using it. It’s not unusual for JavaScript developers’ code to become full of repeated logic or at least repeated function calls to do activities like setting headers, loading tokens, transforming responses, and so on. And there’s nothing wrong with creating functions for these repetitive activities, except that Axios has a mechanism to handle these transformations and configurations intelligently and in the box.
This feature is called Interceptors, and today’s tutorial is about it. If you prefer, you can learn about interceptors from the link below instead of reading this tutorial.
Example project
For the examples, we need a small project.
First, let’s create a simple web API with two versions, unsecured and secure. I won’t go into too much detail as it’s beyond the scope of this tutorial. Also, feel free to skip this step if you only want to see the interceptor examples.
Create a webapi folder on your machine and run the commands below inside.
npm init -y
npm install cors dotenv express
Now, let’s create our API with “security”, always requiring a “123” token in the Authorization header to work. This is the content of api-segura.js:
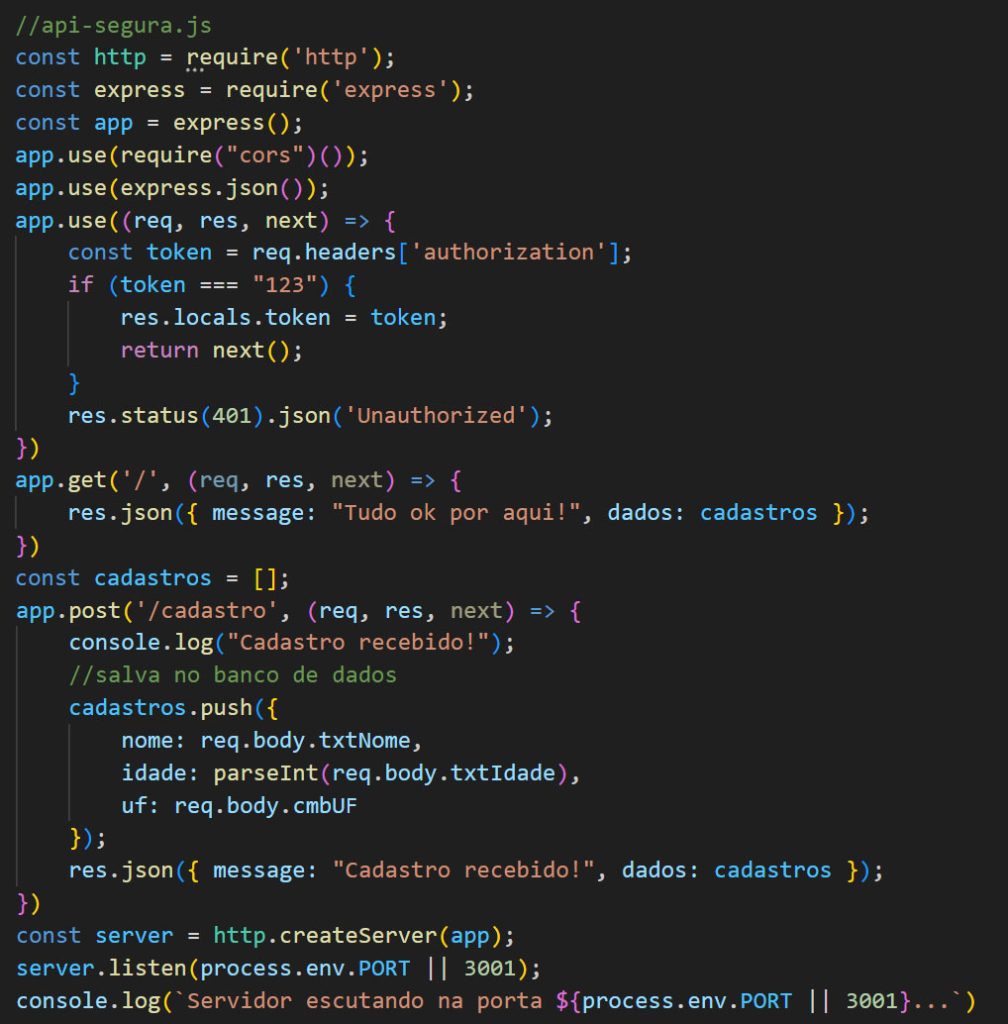
To run this API and leave it running, use the command below. Leave it running in one terminal and then move on, to using another terminal.
node api-segura.jsNow let’s create the frontend project. We’ll do it with React.js, which you can learn more about in this tutorial. But if you don’t know anything, don’t worry, only follow the instructions. Go to another folder on your machine and run the commands below to create the frontend project using React.js and configure it.
npx create-react-app react-axios
cd react-axios
npm install axios
Now create a .env file in the root of your frontend project and place the following content in it. This setting tells the frontend where your backend is, which by now should be running in another terminal window.
REACT_APP_API_URL=http://localhost:3001
Now create a services folder inside src. This services folder will have two files. The first one is APIService.js as below.
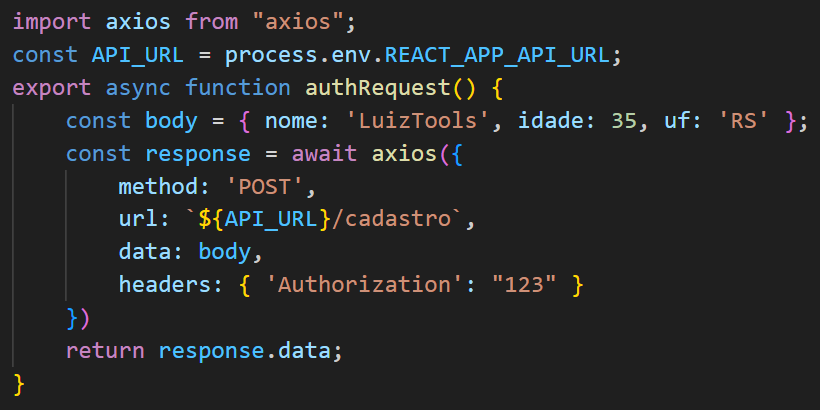
This is an authenticated request function. That “123” token she uses in the Authorization header is usually saved in the browser using localStorage or cookies and must be sent in every request. That’s where the problem lies: the code for obtaining and injecting the token in the request ends up being repeated at different points in the application, which generates future maintenance problems and makes it more prone to bugs due to forgetting it.
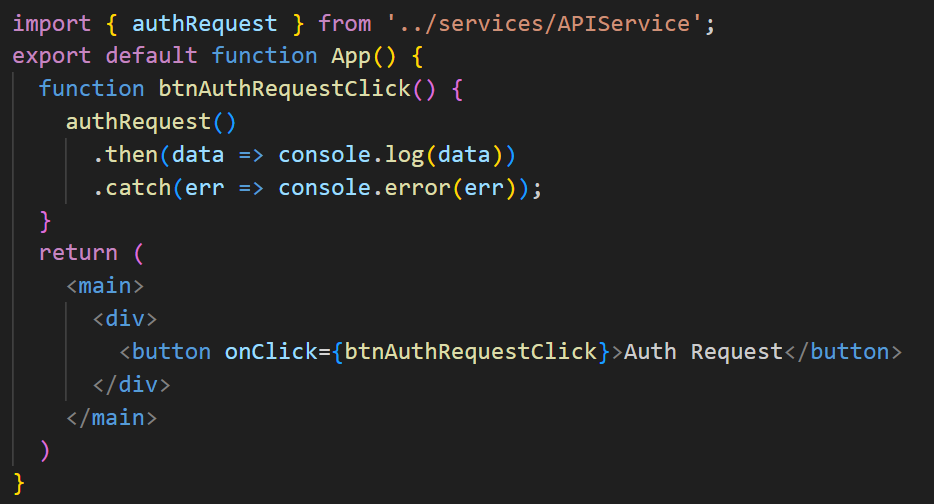
To exemplify a call, we can modify the src/pages/App.js that comes in the default React project to the following. Adjust the path to the APIService.js module if your folder structure is not like mine.
Run your frontend application with the command below, and leave it running.
npm start
Now let’s study the interceptors to make the suggested improvements.
Intercepting Requests
Axios Interceptors work similarly to Express middleware, when you have intermediate processing that takes place between the arrival of the request or responses and the return of the same. This processing can be anything you want, and that is possible to implement via JS, such as always adding a header of your choice to all requests or changing the text of a response according to your code.
Let’s start with a simple example of request interception. When you make a request, our code will be executed before it is sent to the server. For that, let’s start by creating a module in our project called BaseService.js that will serve as the default for all our calls via Axios.
A common activity in requests with Axios is to include a token in the request header to be authenticated (generally JWT tokens). It is simple but repetitive code, like the one below. So, if the code always is the same, you can put it in BaseService.js using a request interceptor like the one below.
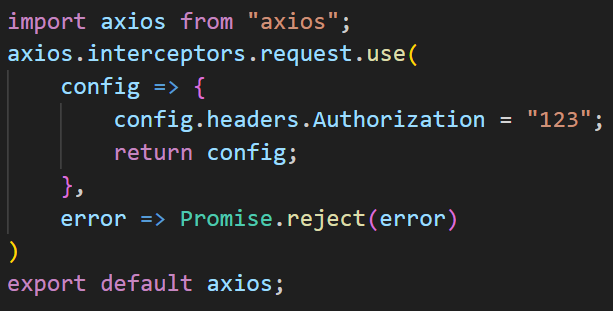
Here I took a literal value, but imagine that instead of 123 you would take a localStorage or cookie, for example. Or any other processing you want. In all the services you create in your application, instead of loading Axios directly. you should load the BaseService and use it, then you will automatically have the token sent in each request, without the need for additional (and repeated) code, as below (APIService.js file).
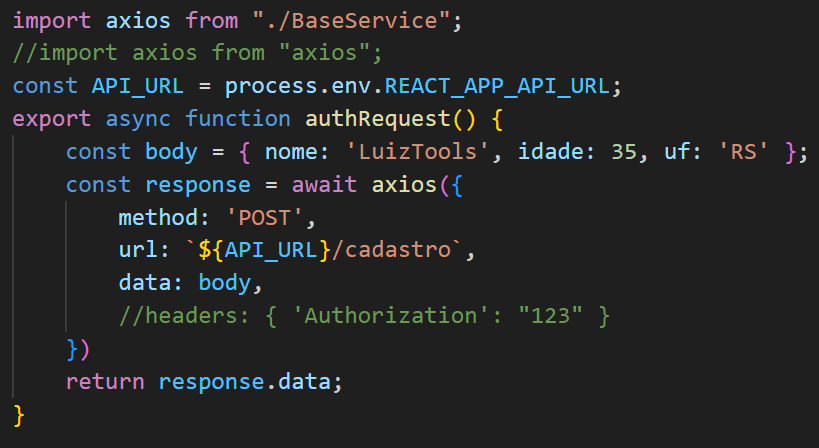
Notice that the ONLY things that changed from this version to the previous one are that, I import BaseService instead of Axios and that I commented out the headers line. This would cause an error when testing the frontend application, but in this case, it will continue to work, as the BaseService interceptors will always act before each request, injecting the token in the correct header.
Intercepting Responses
Interceptors don’t just work for requests. They also allow us to have default behaviors on top of the responses received by your clients/services.
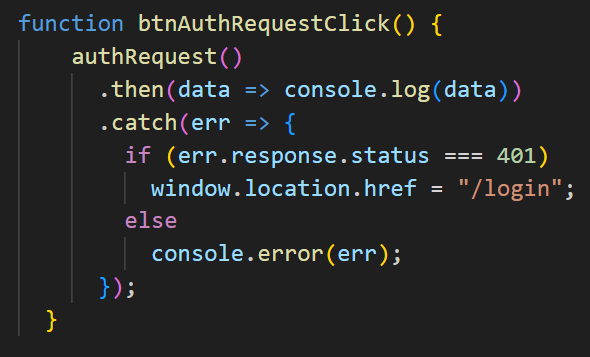
For example, in many frontend applications, it is common for responses with authentication errors to be treated in the same way, throwing the user back to login. We will use this scenario as an example.
The code that tests for these possible authentication errors is below. It easily keeps repeating itself throughout the application.
To change this, we can create a response interceptor in BaseService.js, regardless of what was being called, whether it received a 401 or 403, and sends the user to login.
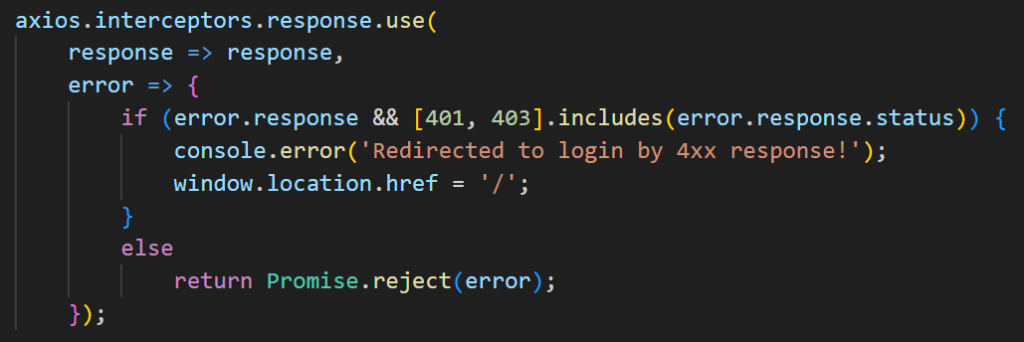
Thus, all requests made using the BaseService will be subject to the processing of their HTTP responses by the above interceptor.
These were two basic examples that show the potential of Axios interceptors. With them, it is possible to drastically reduce the amount of repeated code in your clients/services and thus facilitate code maintenance and avoid forgetting some standard application treatment.
See you next time!
*The content of this article is the author’s responsibility and does not necessarily reflect the opinion of iMasters.


Leave a comment