


Hey guys,
The first impression is the one that lasts: the creator of this phrase at the time didn’t have a printer. ba dum tiss! What a horrible joke! But what shouldn’t be awful is your app’s impression as soon as it’s opened.
Applications often use SplashScreen, in addition to displaying your app’s logo, as a device to load something that can take a while before starting.
This feature turns out to be very useful, to making the opening of your app much prettier!
But what about Xamarin.Forms? When I create a new project and open it on iOS, I see a Blue Screen, on Android, I see nothing. Is there a way to do it?
Let’s see how to use SplashScreen on both platforms from your Xamarin.Forms App!
There are several ways to do it. I’ll show you a very simple one that will help to leave your App with a cool opening!
Let’s go.
Getting started easy — iOS
Creating a SplashScreen on iOS is the wrong way to say it because it already exists, and we’re just going to customize it. 😀
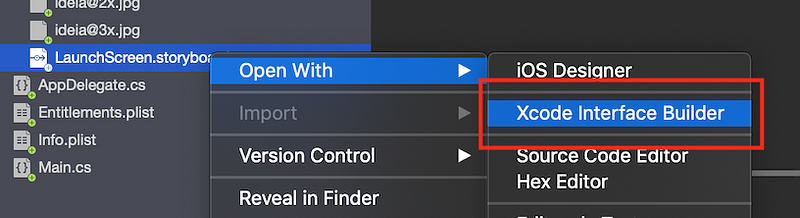
If you notice in your iOS project, there is a “LaunchScreen.storyboard” it is displayed as soon as the app is Run:
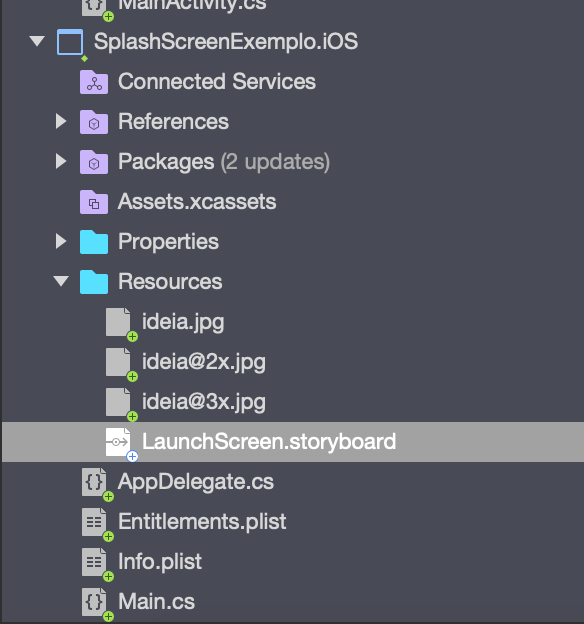
Customizing is simple. To help with the example, I added an image in the Resources folder. (don’t forget to cater to all types of screens). Then click on LaunchScreen.storyBoard, and in VisualStudio itself, you can customize:
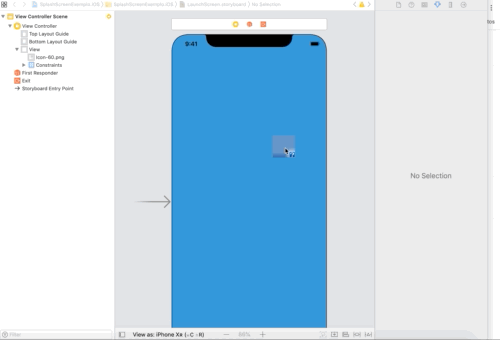
As Xamarin is NATIVE! If you don’t want to use VisualStudio, you can also customize it using Apple’s own Xcode:
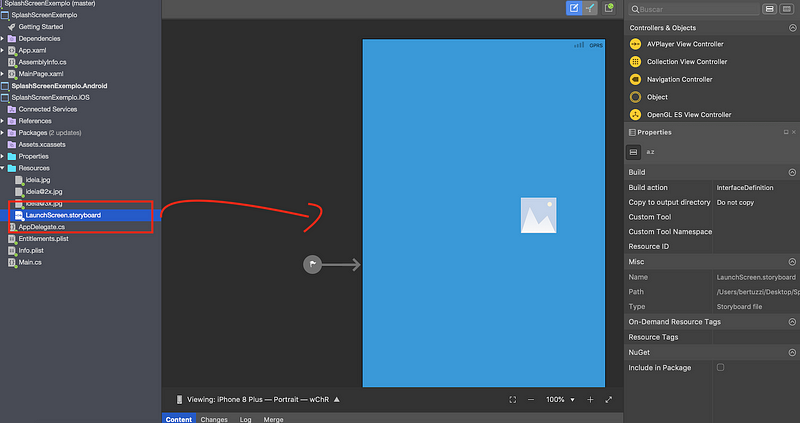
I’ll show in the gifs below how Xcode itself recognizes our resources, and we can change any of the properties as if it were an iOS project developed in Swift:
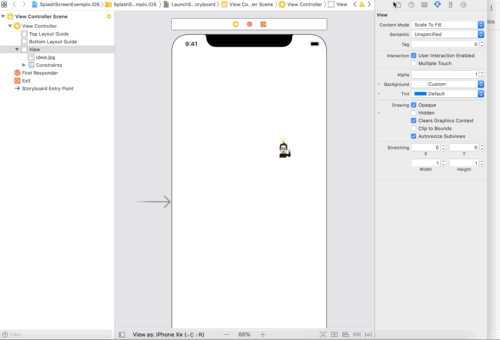
I just selected our image, changed the background to White, and added two Constraints. These are responsible for ensuring that no matter the screen size, the image will appear centered.
If you want to understand how iOS Constraints and Autolayout work. Click here.
Now let’s save, go back to VisualStudio and Run:

Você pode adicionar Imagens, Animações, Label’s e etc. There goes your creativity/need. ?
Creating SplashScreen from Scratch — Android
First, let’s add the image to the Android folders, just like iOS.
As you may have noticed, Android doesn’t have this LaunchScreen.storyBoard. So let’s create a similar Layout and start it before our Main.
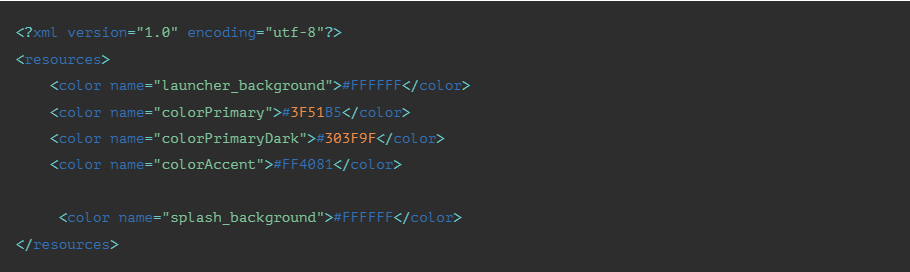
First, let’s create a color for our Splash screen in the Values folder, in colors.xml, called splash_background, with white:
Inside the Drawable folder, let’s create the content of our screen, the Xml responsible for displaying the image:
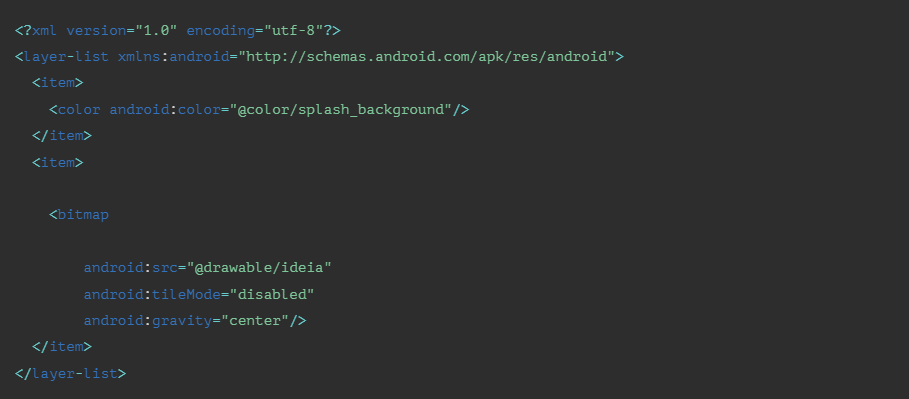
Our screen is simple, just a bitmap. This component displays an image. ?
Then, in the Styles.xml file, create a style called MyTheme.Splash, which will be responsible for the new screen settings:
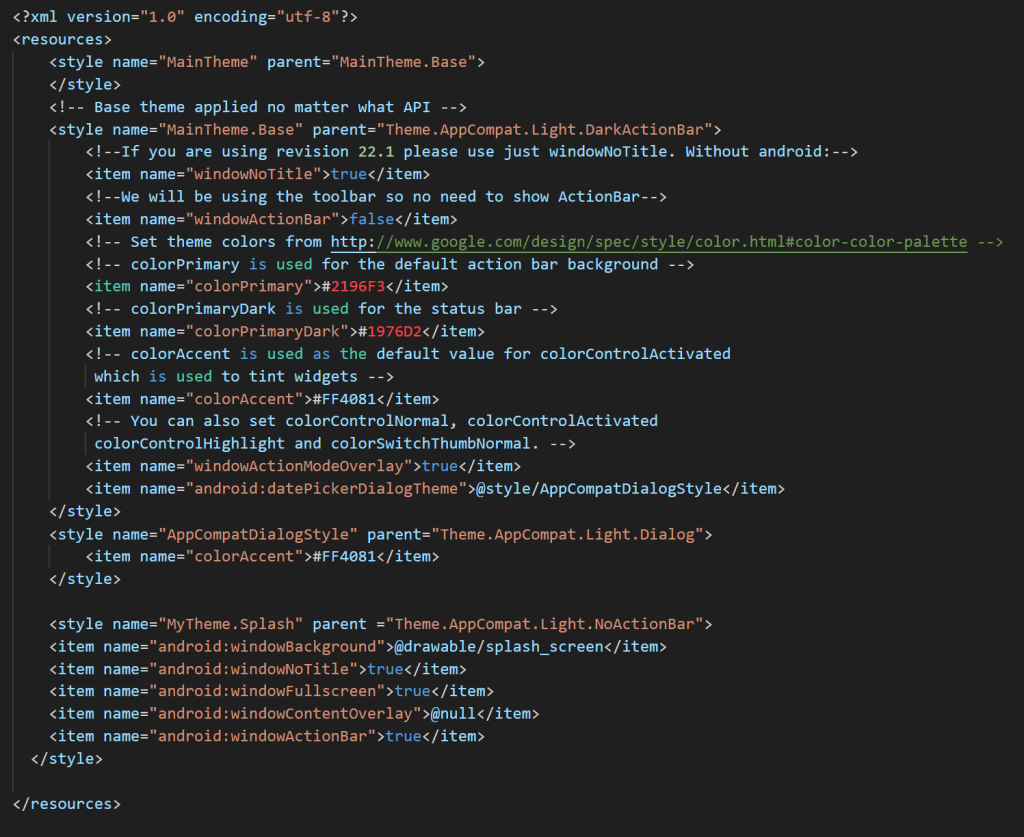
The properties I defined are to simulate a full screen, hiding the status bars and everything that exists in the interface.
Finally and very importantly, let’s create our Activity, our new splash screen:
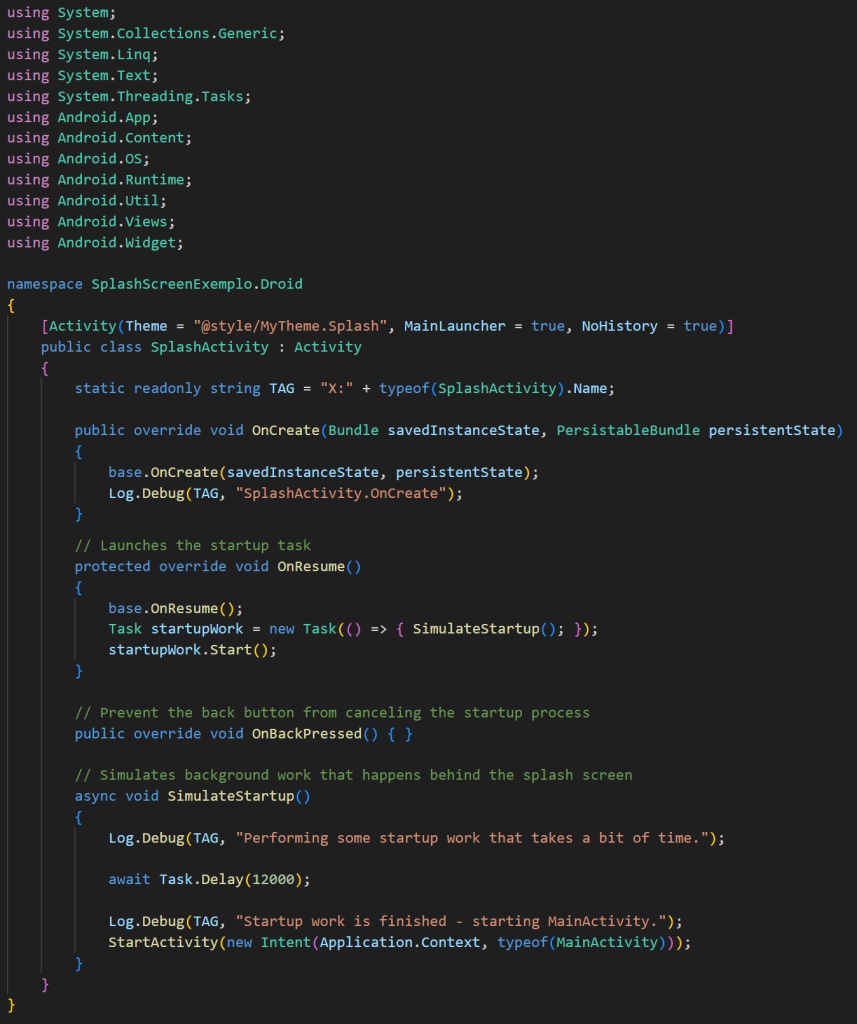
You must add MainLauncher = true to this Activity and remove it from MainActiviy.cs. This will tell Android to open that Activity first.
I added a delay to simulate the startup. This can be useful if you want to load something in your app while it opens and displays Splash.
Then, when the tasks are finished, we open the MainActiviy and start the app again.
If you want to understand more about Activity, we have the official Xamarin.Android documentation by clicking here.
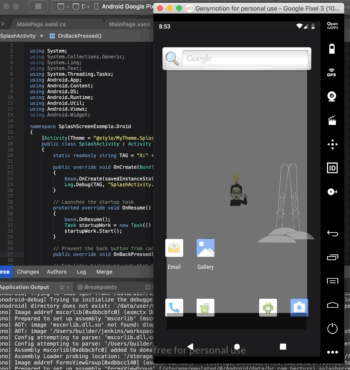
Running:
As I said, in iOS, you can add other controls and improve your screen.
This is a simple example of Splash for Android, not that it’s the only way. It’s a simple way to do it faster and has a Splash screen. ?
If you want, I can even start making some Xamarin series with the classic approach to help when creating native controls. ?
If you want to download the code used in the example: Click here.
Hope this helps!
All the best!
*The content of this article is the author’s responsibility and does not necessarily reflect the opinion of iMasters.


Leave a comment